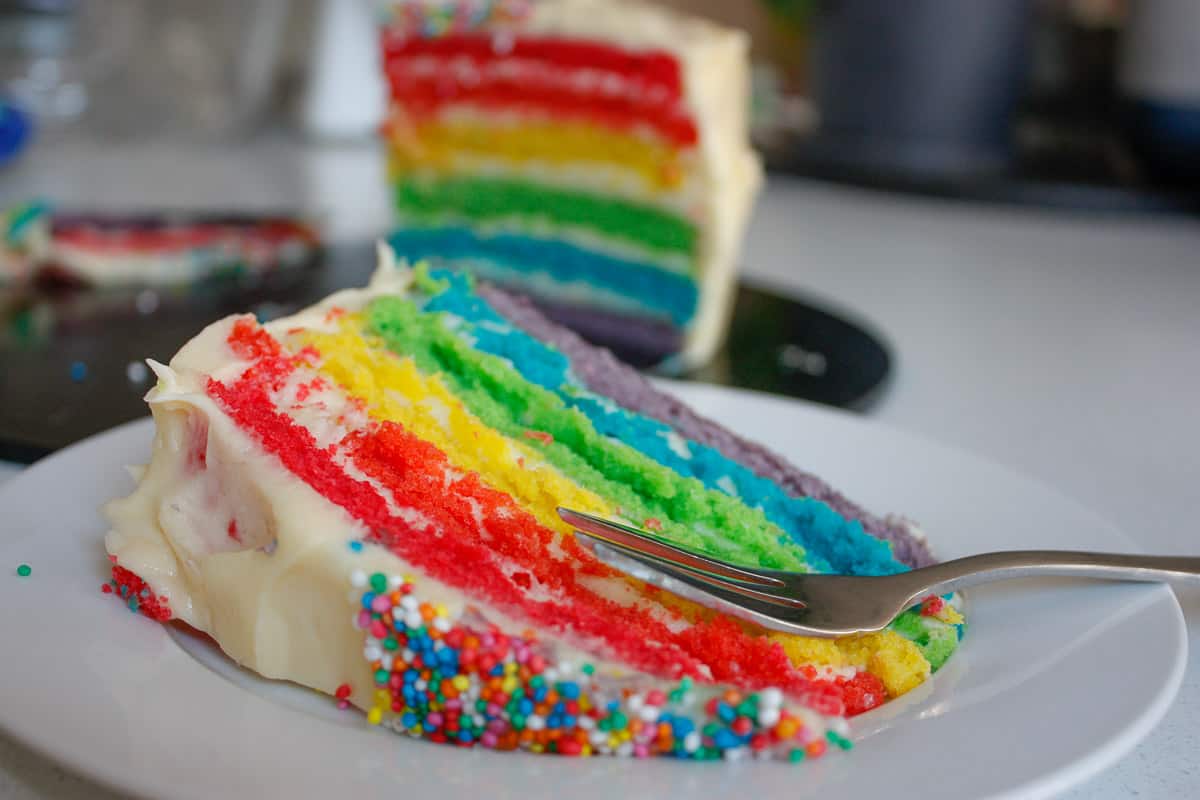
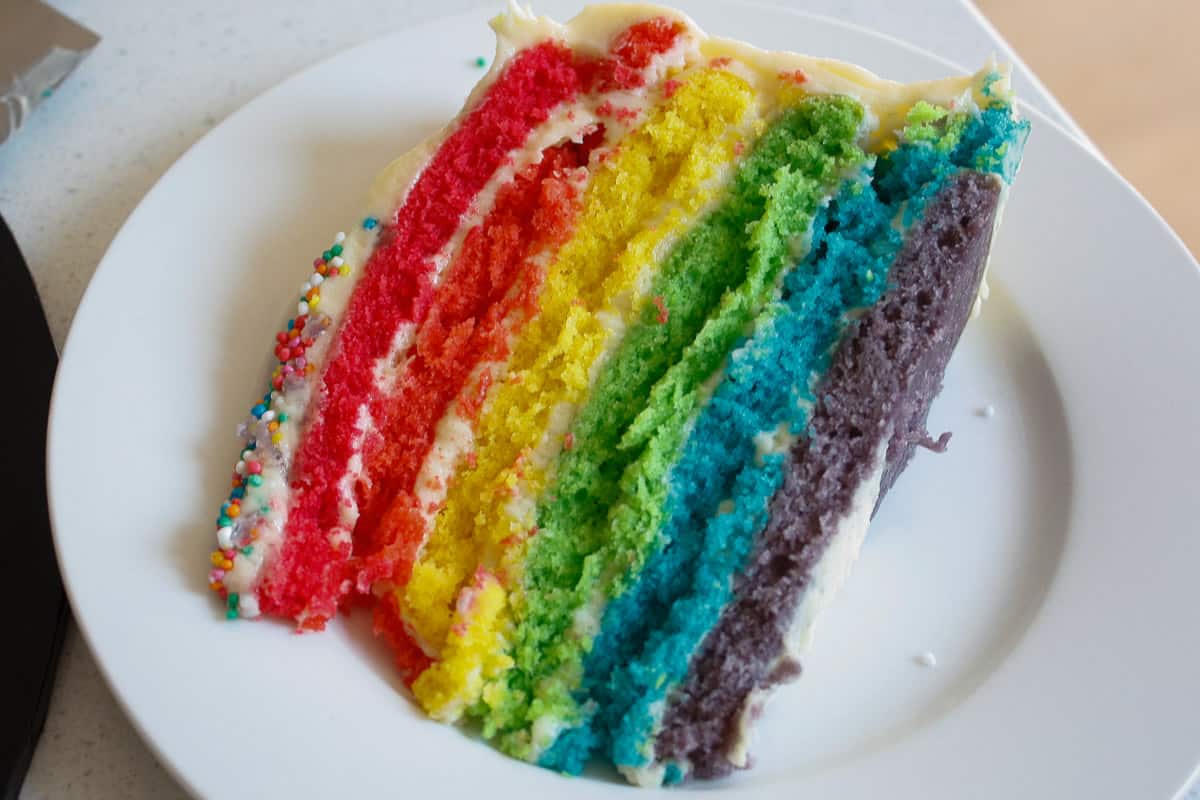
🌈 Rainbow cake with rich vanilla-flavoured layers. Six coloured cakes sandwiched together and smothered with cream cheese frosting. Happiness in slices😁
Rainbow cake is a quiet showstopper. The plain cream-coloured exterior hides a fun secret, hidden until you cut the first slice. Not only is it pretty; it tastes really good! The buttermilk in the sponge and the cream cheese in the frosting add a slight tang. This stops the cake being cloyingly sweet. It also adds a bit of a 'grown-up' element. It's everything a colourful celebration cake should be.
I have slightly adapted the cake recipe from Divas Can Cook. I've reduced the amount of sugar by 10%. I've substituted the cream cheese frosting recipe with one from The Bake School. It's a beautifully balanced frosting that isn't so sweet it gives you a headache. The Bake School link explains why cream cheese frosting usually has more sugar than plain buttercream. We can overcome this by changing the order in which you blend the sugar, butter and cream cheese. Simple but genius.
Below I give the 'why' for recipe steps with some photos of the process. You might have read this before or know already 🤓. In that case, please feel free to skip straight to the recipe by using the 'Jump to Recipe' button.
Overview
- Make a cake batter
- Divide the batter into six equal portions and colour each
- Bake each cake for about 15 minutes. The number of batches will depend on how many matching cake pans you have
- Cool the layers and stack with layers of cream cheese frosting
When my soon-to-be-6-year-old asked for a rainbow cake for his birthday, I was pretty happy about it. It was a gentle and sensitive choice for my spirited little monster. It seemed like a cinch after Minion and Moana-themed cakes in the past. Please note: there will never be a recipe for these on this site! 😉 I have retired from making fondant-covered cakes. I spent 9 years slaving over them for my kids' birthdays; I've done my time. No more cakes that take 10 hours to decorate (no exaggeration!). No more gravity-defying attachments. No more fitful nights' sleep overthinking - will all the bits stay in place long enough to make it for photos?
🥘 Ingredients
We need softened (not melted) butter for both the cake and frosting. Get the butter out of the fridge the night before or at least a couple of hours before starting. While you're at it, get the buttermilk, cream cheese, cream and eggs out of the fridge in advance too.
The cake batter contains buttermilk and baking powder. These work together to give the cake a light fluffy texture. The generous amount of baking powder compensates for a couple of things special to this cake. The batter must cope with sitting around while we cook the layers in batches. It's unlikely you have six cake pans the right size (I have three). We also must work the batter quite a lot to blend in the food colouring without streaks. It might take a bit of trial and error to get the level of food colouring right. This is a very 'forgiving' batter. The cakes will still end up tender and soft.
If you're using one brand of food colouring, you'll need the same number of drops for each layer. How many drops will depend on the brand and how intense you want the colours to be. Gel food colours (rather than liquid) tend to be more concentrated (less watery); you'll need less. The first time I made this, I needed about 60 drops of food colour per layer (!). I spent a bit more on a better brand next time and only needed 6-8 drops. Start slow and see how you go if you're making this for the first time.
🔪 Instructions
We prep our cake pans by greasing and flouring them liberally. The layers are very thin and the batter is fairly thick. We need to spread out the batter rather than pour it in. Baking paper is not our friend here. Don't bother. Use a generous amount of softened butter. Spread all over the base and a little up the sides (the cakes are thin). Pay particular attention to the inside corner. Tip in about a tablespoon of plain flour. Shake it all over for an even layer stuck to the butter. Knock out any excess; you can tip into the next pan to repeat. I've found that there's no need to repeat this process between batches unless using the pans for a third time. Give the pans a light wipe-out with kitchen paper to get rid of crumbs before proceeding to the next batch.
We start the recipe by creaming butter and sugar for the cakes.
What does creaming butter & sugar mean?
What does it mean to 'cream butter and sugar' Many baking recipes start with this instruction. When we cream butter and sugar, we're using the sugar to punch holes into the butter. These holes will then capture air which will help make your baked goods rise in the oven. The butter has to be 'Goldilocks' soft before creaming - not cold out of the fridge, not melted. Leave out for an hour or two at room temperature. When creaming, the sugar won't dissolve completely. You can test the mix between your fingers; it will feel a little grainy. A proper creamed mix will be fluffy and lighter than the mix when it was first combined. This will take 2-3 minutes at moderate speed in a stand-mixer fitted with a paddle attachment. Yes; you can over-cream - the mix will become almost white and will have a sunken greasy look. This will create dense, gummy streaks in your baked product which aren't very nice.
After creaming, the other cake ingredients are simply added in. A stand mixer makes light work of this. Don't worry if the batter curdles when you add the eggs; it will come good once you mix in the dry ingredients.
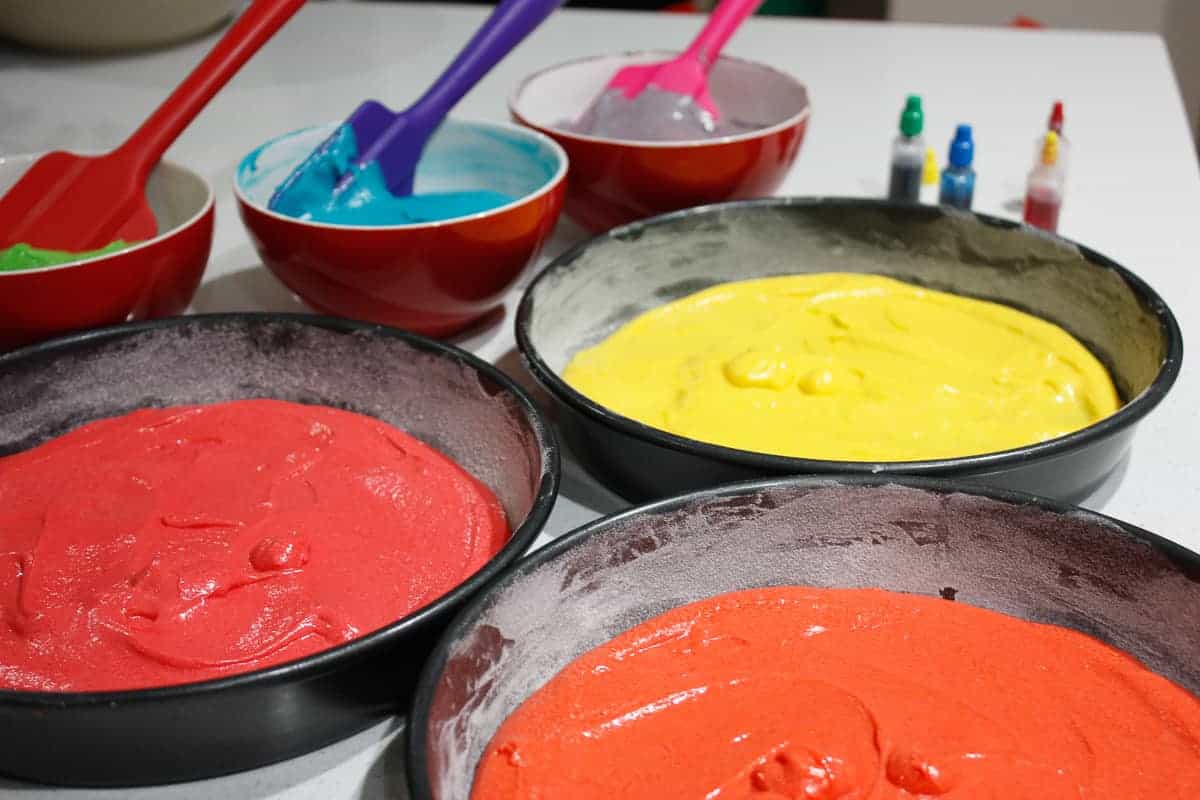
Once we've made the cake batter, we need to divide it into six equal portions, for each of the layers. This is important, for consistent depth of colour, aesthetics and bake time. If you know the weight of the mixing bowl, even better. Otherwise, transfer the batter into another bowl to weigh. Put the portions of batter into small bowls and start making up your colours. A flexible spatula is handy for folding through until there are no streaks. Add more colour if the depth of colour isn't too your liking. Try and keep count of the number of drops you use - this will be a guide for the other layers. For orange we need equal parts red and yellow colour; for violet, use mostly red with a touch of blue.
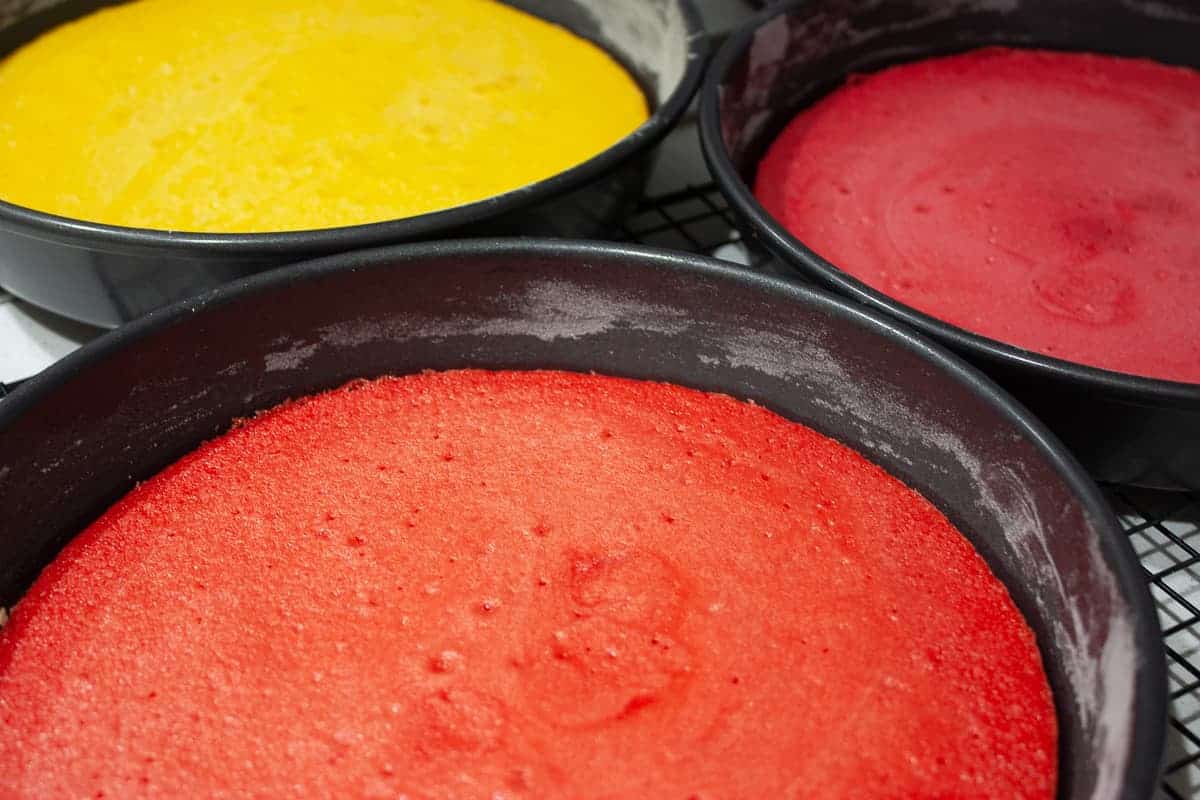
The cakes take about 15 minutes to cook but check after 10 minutes if making this for the first time. You'll get a feel for how long it takes. A skewer inserted through the centre should come out clean. These cakes are so thin you can kind of 'eye-ball' doneness. The batter will look drier and a bit bubbly. If you press with a light finger, there will be some bounce.
Remove the cakes from the oven and rest in their pans for a few minutes. The cakes will shrink away from the sides slightly as they cool. Take your time turning them out to cool completely. These are thin and fragile. Run a flexible spatula around the rim and slightly under the edges. Go round again pushing the spatula further under. Shake the cake in the pan until you see and feel it shift. Gently tip out onto your hand and then onto a cooling rack.
Allow the pans to cool to room temperature before proceeding to the next batch.
The layers of cake all need to cool completely before proceeding to frost or putting away for later. If not frosting straight away, wrap each layer well in plastic wrap.
Aim to use about half the frosting for sandwiching the layers together and the rest for the outside.
The frosting can be as neat or rough and ready as you like. You might want the colour hidden, or more of a 'naked' cake where you can see a hint of colour. Either way, you'll get the neatest finish by doing a 'crumb coat'. Apply a thin layer of frosting and transfer the cake to the fridge to set. You can then apply a thicker coat without the crumbs.
For the best finish, you can transfer the frosting in batches to a piping bag fitted with a large round nozzle. Pipe fat lines of frosting all over the top, starting from the centre and moving in a spiral. Then pipe lines all the way around the sides from top to bottom. A cake spinner is handy for this. Spin with one hand and use the piping bag with the other. Use an offset spatula to smooth. This provides even coverage without contaminating your frosting with cake crumbs.
You'll get super-clean layers if you cut the cake from cold (not done in these photos!). But the cake tastes better at room temperature. Once cut, the cut surfaces will dry out a little. You may want to cut thin slices to discard. I like to cut neat slices from cold and microwave for the briefest time. 10 seconds is perfect to soften the frosting ever so slightly.
📖 Recipe
Equipment
- up to 6 cake pans 23cm diameter
- Stand-mixer
Ingredients
Cake Batter
- butter for greasing pans
- plain flour for dusting pans
- 225 g butter
- 450 g white sugar granulated or caster
- 3 eggs
- Tablespoon vanilla extract
- 225 g buttermilk
- 60 g double cream
- 360 g plain flour
- Tablespoon baking powder
- ½ teaspoon salt
- food colouring red, yellow, blue, green (note)
Frosting
- 270 g butter
- 350 g icing sugar
- 800 g full-fat cream cheese
- Tablespoon vanilla extract
- ¼ teaspoon salt
Instructions
- Make the cakePrepare Pans - generously grease the cake pans with butter and liberally dust with flour (note)butterplain flour
- Cream Butter & Sugar - in a stand mixer bowl fitted with the blade attachment combine softened butter and sugar. Blend at medium speed for around 5 minutes until the mixture lightens in texture and colour225 g butter450 g white sugar
- Eggs - whisk together eggs in a small bowl. Add, a little at a time, to the creamed butter and sugar until thoroughly incorporated3 eggs
- Wet Ingredients - add in vanilla extract, buttermilk and creamTablespoon vanilla extract225 g buttermilk60 g double cream
- Dry Ingredients - in a separate bowl, whisk together the flour, baking powder and salt360 g plain flourTablespoon baking powder½ teaspoon salt
- Combine Dry with Wet - in two batches at low speed, add the dry ingredients to the wet. Combine just enough so that there is no dry flour visible
- Divide Batter - evenly into six bowls (note)
- Colour Portions - add food colouring to each bowl. You want red, orange (equal parts red and yellow), yellow, green, blue and violet (mostly red with a few drops of blue). Use a rubber spatula to combine wellfood colouring
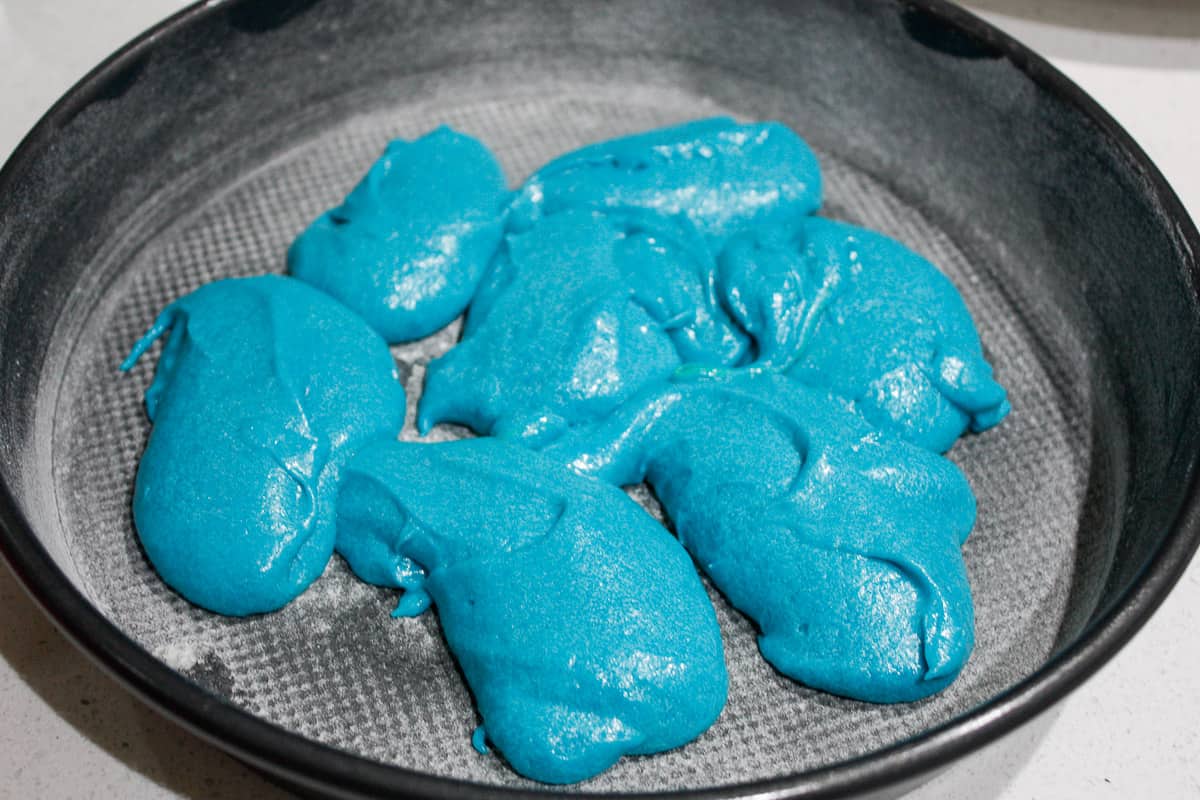
- Bake - dollop each colour batter into the centre of a cake pan and spread out evenly. Cook for 10-15 minutes, until the centre is set. You'll get a feel from the first batch - test every minute from 10 minutes
- Cool & Turn Out - let the cakes cool a little in the pans before turning out. They will shrink away from the pan around the edge. Use a flexible spatula to work around the edge and under, all the way around the perimeter. Shake the cake slightly within the pan until you see it shift and you know it's loose. Gently put your open palm on top of the cake and tip out close to a cooling rack. You want the cake to fall out ever so gently. Allow the cake layers to cool completely before icing
- Repeat - steps 9 & 10 for the remaining portions of batter. Allow the pans to cool completely in-between batches. Wipe them out gently with paper towel to brush out any cake crumbs
- FrostingCream Butter and sugar - add the butter to a stand mixer bowl. Sift in the icing sugar. Blend together at low speed using the blade attachment until well blended270 g butter350 g icing sugar
- Cream cheese, Vanilla & Salt - add these and mix at low speed until well combined800 g full-fat cream cheeseTablespoon vanilla extract¼ teaspoon salt
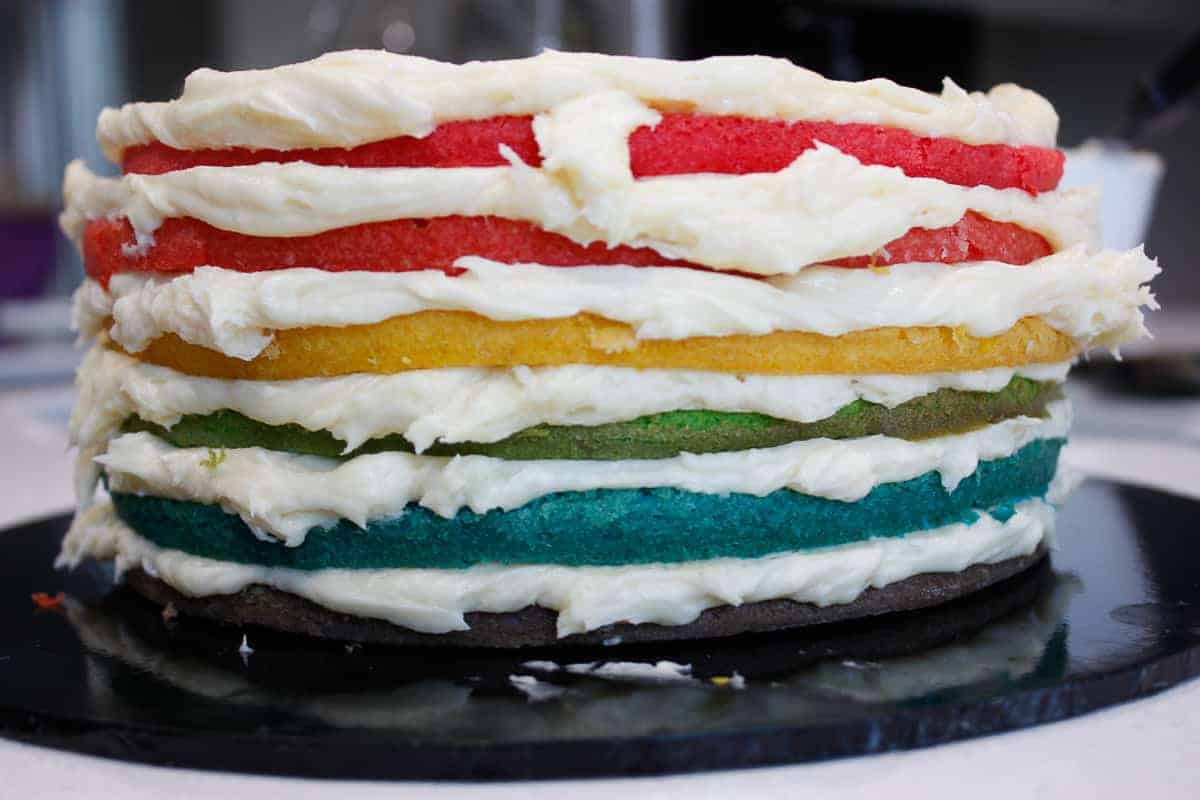
- AssemblyLayer Cakes - in rainbow order with icing in-between. From bottom to top - violet, blue, green, yellow, orange & red. Use about half the icing for sandwiching layers, the other half for the outside.
Comments