Focaccia is Italian 'flatbread' that is not flat at all. The hallmark of good focaccia (which this is!) is a highly soft and bubbly crumb and a crisp olive oil-rich crust.
The high hydration level of the dough (a high liquid to flour ratio) gives focaccia an incredibly fluffy interior.
Plentiful olive oil beneath, within and on top of the dough makes this bread rich and moist inside. A bake in a very hot oven results in a crust that tastes almost fried. We create a dimpled surface by pressing into the dough with oiled fingers just before baking (so much fun!). This further enhances the texture, resulting in a wonderfully crisp shell.
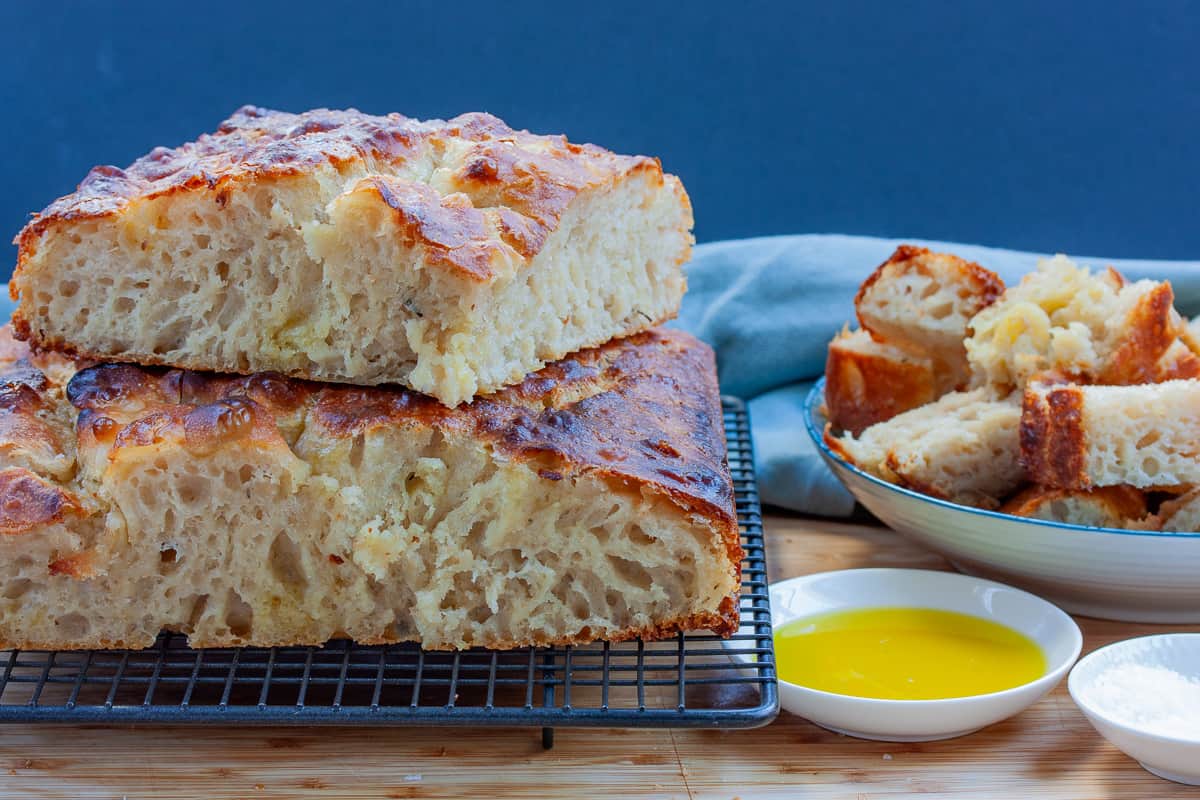
This bread is surprising easy to make. The hardest part is remembering to start a few days ahead. The bubbly texture is achieved by a long cold rise in the fridge (up to three days).
Made using a handful of basic ingredients, we use a stand mixer to do most of the kneading of the wet dough. After this, the hands-on time required is minimal. It only involves a few minutes of 'slapping and folding' on the work surface. This is as fun as it sounds 😊.
It's incredible how this slimy, stretchy dough transforms into a delectable masterpiece. No complex shaping techniques are necessary. I've made this recipe many times. It always receives rave reviews. It's reliably good. In my honest opinion, it's the best focaccia I've ever tasted.
I've seen contestants on the 'Great British Bake-Off' attempting to make Focaccia. Most of them had never made it before. They found themselves second-guessing the provided recipe because the dough was so wet. Many assumed they'd made a mistake or that the recipe was wrong. They added more flour or withheld some water to 'fix' it. Trust the recipe. It is a very wet dough.
The long fridge rise allows the yeast to naturally work its magic. There is no sugar added. A similar technique is used in my Traditional Pizza recipe. A long, cold rise produces a dough with delightful bubbles and and great flavor. Although the dough hydrations differ, the end results are equally worth the wait.
❓ Steps for Making Focaccia
- Make and knead the dough in a stand-mixer
- 'Slap and fold' by hand for a few minutes
- Leave in the fridge for up to 3 days
- Pour dough into baking tin and leave at room temperature for 3 hours. Preheat oven.
- Drizzle with olive oil and dimple dough with your fingers. Sprinkle with flaky salt.
- Bake in a very hot oven for 20 minutes, turning the pan half way
- Enjoy!!
Focaccia freezes and reheats exceptionally well. Thanks to the oil within the dough, it remains moist and tasty, even after freezing.
This recipe is from Joshua Weissman, whose YouTube videos I love. I compared lots of focaccia recipes before finding 'the one'. The ingredients and their ratios was amazing consistent between recipes. It was the rise times that varied the most. Josh's was the longest, which makes sense to me to achieve the most airy, bubbly texture. This is the hallmark of a good focaccia. Doing literally nothing for a touch longer seems like a no-brainer for me.
🥘 Ingredients
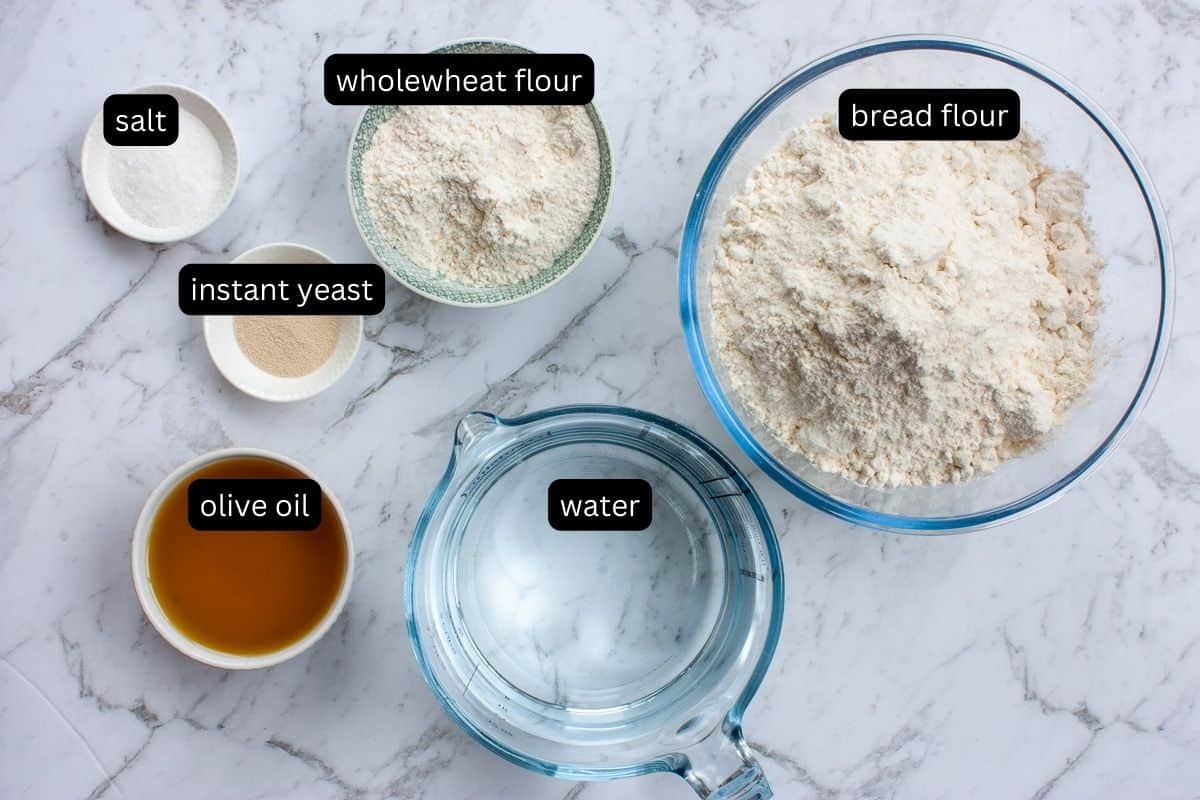
Bread Flour - Bread flour contains more protein (gluten) than plain flour. More gluten means stronger, more stretchy dough, which is critical for a tall, airy loaf of bread. I've subbed up to 50% of the bread flour for plain flour before (because I didn't have enough bread flour). It still turns out delicious - the dough will be a little looser to deal with and it will be slightly less bubbly, that's all.
Extra Virgin Olive Oil - this is what makes focaccia taste so unbelievably delicious. It adds to the texture as well as the flavour of the bread.
Instant Dried Yeast - yeast creates all those wonderful bubbles. Instant dried yeast is a convenient form of yeast. You don't even need to add warm water to it to activate.
Salt - generous amounts used here; cooking salt in the dough and flaky salt sprinkled over before baking. This elevates flavour (of course). Bread without salt is bland as 😊
Wholemeal Flour - a relatively small amount of wholemeal flour contributes a complex, earthy nuttiness.
🔪 Instructions
Make Dough
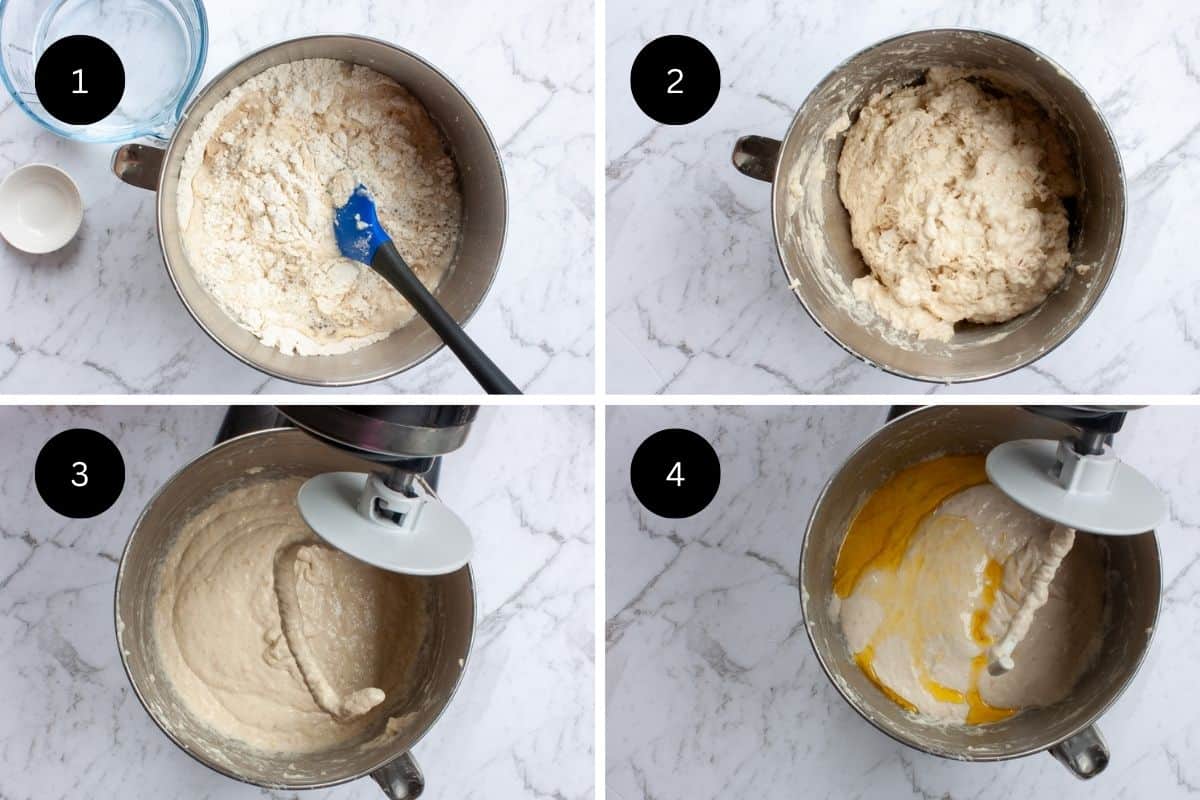
We combine both types of flour with the yeast straight in a stand-mixer bowl. We add the water to it in two batches. This is a very wet dough and adding in stages makes combining wet with dry ingredients a bit easier. Combine with a flexible spatula first before using the stand-mixer. We knead for 10 minutes before adding the salt and kneading for another 10 minutes. The long knead time helps the protein molecules in the flour to form, creating healthy gluten strands. Gluten is what helps the mixture create gas, which helps it rise and build texture. We add the salt halfway through to give the yeast time to warm up a little and be worked through the dough first. Salt is known to inhibit the action of yeast. And there's a fair amount of salt in this bread. Lastly, we add some oil and combine again.
Slap & fold/Fridge Rise
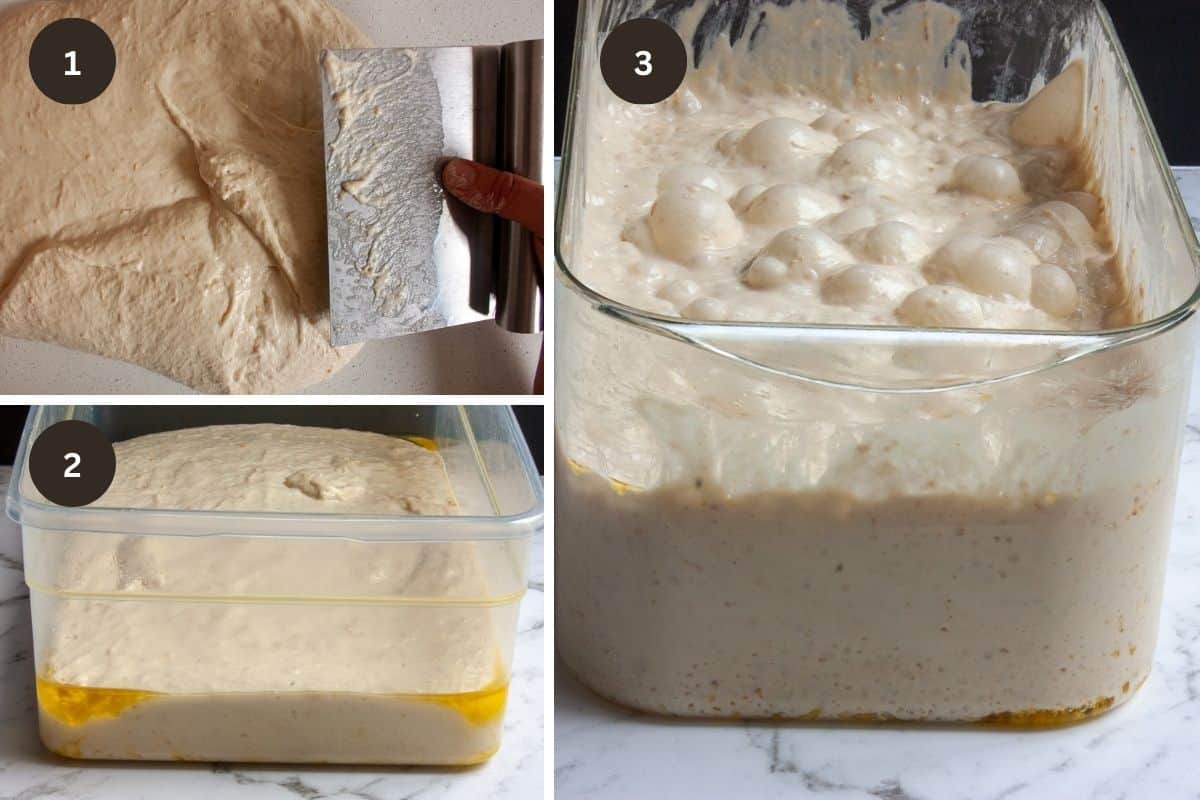
(Photo 1 above) We literally pour the dough (that's how wet it is!) onto a work surface for the brief hands-on time. We 'slap and fold' the dough for a couple of minutes. Pick up the dough (as best as you can pick up a very loose thing!) with a hand either side. Imagine a large 'O'-shape resting on the work surface side on to you. Draw this shape with your hands, moving towards your body and then away. Let go of the dough (some will stick to your hands) and pick it up again, this time from the folded sides and draw an 'O' shape facing you. Do this for a couple of minutes, alternating between east-west and north-south orientation of your hands with each slap and fold. The dough will become nice and smooth and not quite so sticky.
(Photo 2) We then transfer to a large rectangular container.
You'll find that the dough rises like crazy over the first few hours or so, then settles slightly. It's important to use a container that's big enough. I've had Alien-esque scenarios where the dough seems like it will take over the fridge. If it overflows the container, just coax it back it (and use a bigger container next time!) 😊
(Photo 3) after 3 days in the fridge.
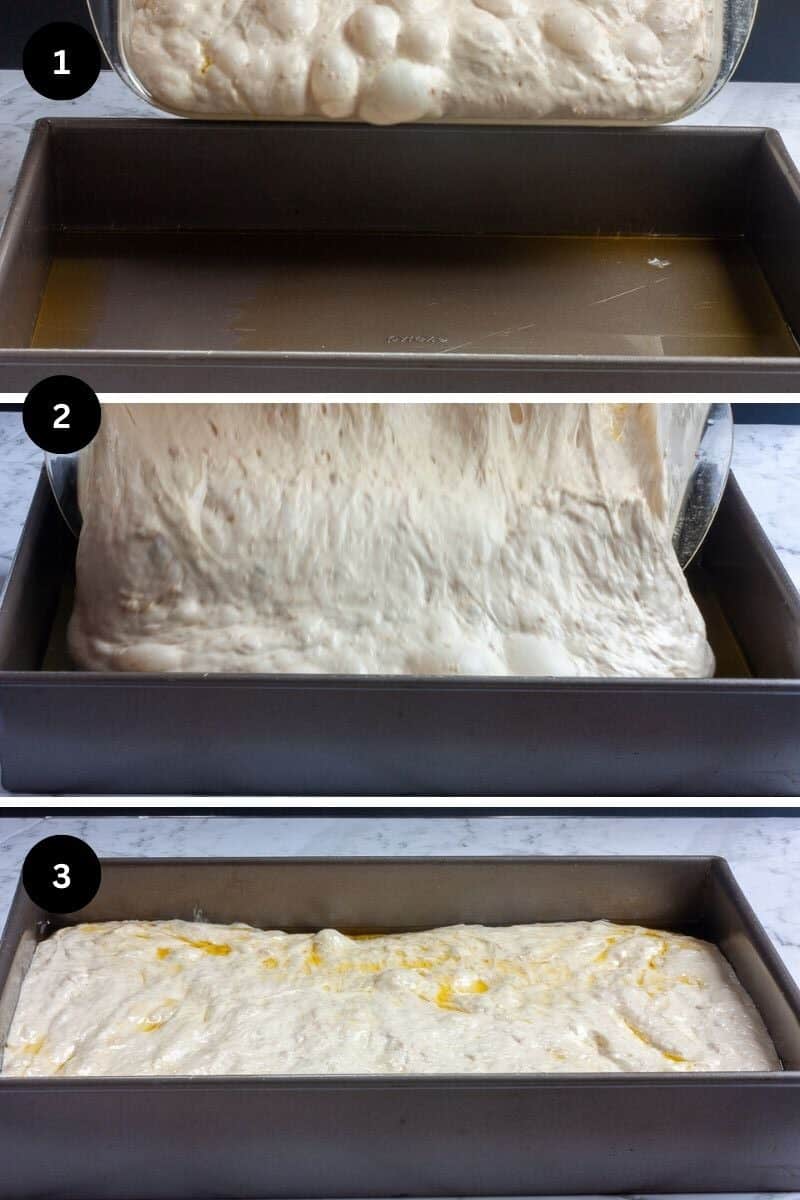
You want to disturb the dough as little as possible when transferring it from fridge container to baking pan. Gently un-sucker the edges and pour into the oiled pan. (Photos 1-3 above). Leave it to relax and bubble up again for up to 3 hours at room temperature before baking. Cover it but allow room for some growth so that you're not going to peel a cover off and tear those wonderful bubbles. Allow the last hour of the rest time to crank up your oven to as hot as it will go.
Dimpling
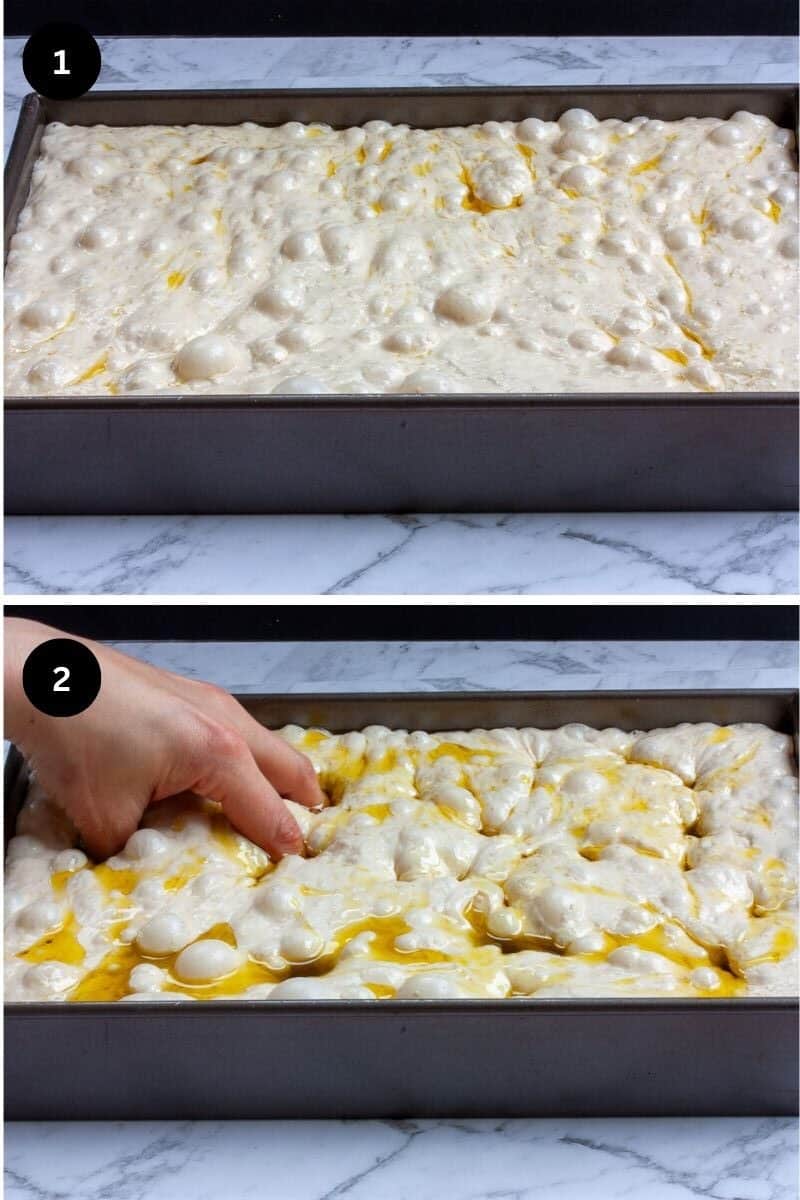
(Photo 1 above) The dough has bubbled up again. The oven is screaming hot.
(Photo 2) Just before baking we pour another ¼ cup of oil over the dough, oil your fingers (so that you don't rip the dough) and form a claw. Press into the dough all the way (so that your fingertips touch the bottom of the pan). This creates texture on the surface, bubbles throughout and crevices for oil to pool and 'fry' the dough. Sprinkle generously with flaky sea salt and put straight in the oven.
Oven-ready
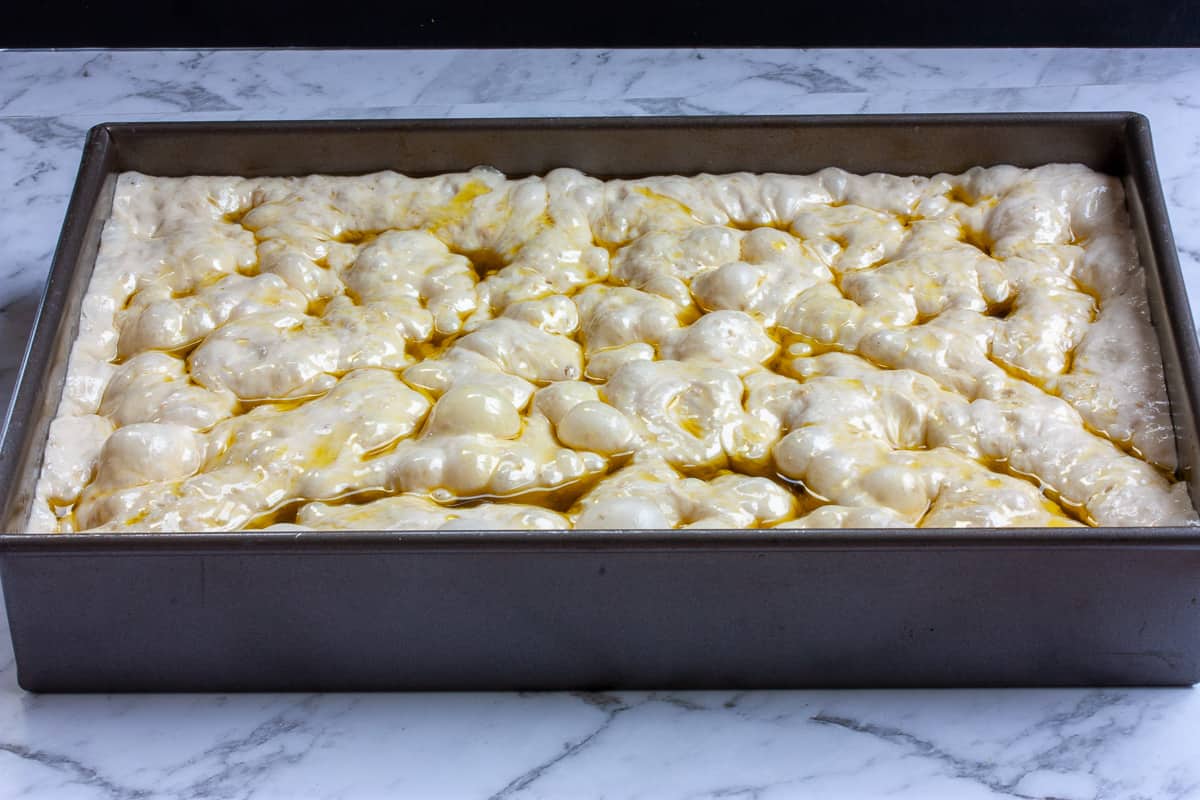
Bake for 20 minutes. A little bit of charring is all good. Rotate the pan half way through the bake time. Once baked, drag the loaf out of the tin ASAP and onto a cooling rack. Don't turn the pan upside down because you'll get oil everywhere (can you tell I've done this before?!). Allow to cool slightly. This bread is sublime served warm.
📖 Recipe
Equipment
- Deep roasting pan (32x 23cm, at least 5cm deep)
- Large rectangular plastic container (about 4 Litre capacity)
Ingredients
- 820 g bread flour
- 120 g wholewheat flour
- 830 g lukewarm water
- 2 ¼ teaspoons instant yeast 7g
- 20 g salt
- olive oil
- flaky sea salt
Instructions
- Combine Flours - weigh both flours directly in the bowl of a stand-mixer and combine using a hand whisk.820 g bread flour120 g wholewheat flour
- Water & Yeast - add the yeast to the flour with about half the water. Spend a few moments bringing the mixture together with a flexible spatula before adding the rest of the water. This is easier than trying to do it all in one go. Make sure there is no dry flour at the bottom of the bowl. Using the dough hook attachment with the stand mixer at low speed, knead for 10 minutes. You haven't done anything wrong; the mix is supposed to look like loose porridge.830 g lukewarm water2 ¼ teaspoons instant yeast
- Salt - add salt. Increase to low-medium speed and knead for another 10 minutes.20 g salt
- Oil - add 2 tablespoons of olive oil and knead for an extra 3-5 minutes.olive oil
- Slap & Fold - literally pour the dough (that's how wet it is!) onto a work surface for the brief hands-on time. We 'slap and fold' the dough for a couple of minutes. Pick up the dough (as best as you can pick up a very loose thing!) with a hand either side. Imagine a large 'O'-shape resting on the work surface side on to you. Draw this shape with your hands, moving towards your body and then away. Let go of the dough (some will stick to your hands) and pick it up again, this time from the folded sides and draw an 'O' shape facing you. Do this for a couple of minutes, alternating between east-west and north-south orientation of your hands with each slap and fold. The dough will become nice and smooth and not quite so sticky.
- Cool Ferment - transfer the dough to a well-oiled container at least 4x volume of the dough (it grows a lot!) ie around 4 litres. Ideally the container will have a lid (also oiled) or you can use tightly wrapped clingfilm. Put in the fridge for 48-72hrs (up to 3 days!).
- Grease Pan - liberally grease the roasting pan with ¼ cup (4 tablespoons) olive oil.olive oil
- Room Temp. Rest - transfer the dough gently into the baking pan. Go as if to 'pour' dough out. Unsucker the dough with a silicone spatula so that it slides out without disrupting the air bubbles too much. It will generally spread out to fill available space; you can gently maneuverer to edges without stretching too much. Cover the pan with plastic wrap or use an inverted baking tray instead. Make sure that whatever you top the dough with doesn't touch it (and allows space for growth). You don't want to disturb the bubbles by peeling it off. Leave at room temperature for 3 hours. It will bubble up again.
- Preheat Oven - to hottest temperature it will go to; usually about 250°C
- Dimple - just before baking, drizzle the dough (and your fingers) another ¼ cup (4 tablespoons) of olive oil before dimpling all over with your fingertips. You can press all the way down to the bottom. Sprinkle generously with salt.flaky sea salt
- Bake - 20 minutes cooking time, turning the pan halfway through. Nice to get some 'char'.
- Cool on Rack - as soon as it's cool enough to handle, drag the focaccia out of the pan. Allow to cool on a wire rack so that the bottom doesn't get soggy.







Comments