Gingerbread biscuits are sweet crisp buttery biscuits that are full of warm spice. They smell amazing. This dough makes biscuits that don't spread on baking. Gingerbread men without the bloat!
It's a very forgiving dough. This is a good thing because you'll want to maximise the number of biscuits you can make by re-rolling scraps. We can make as many biscuits as possible without compromising texture.

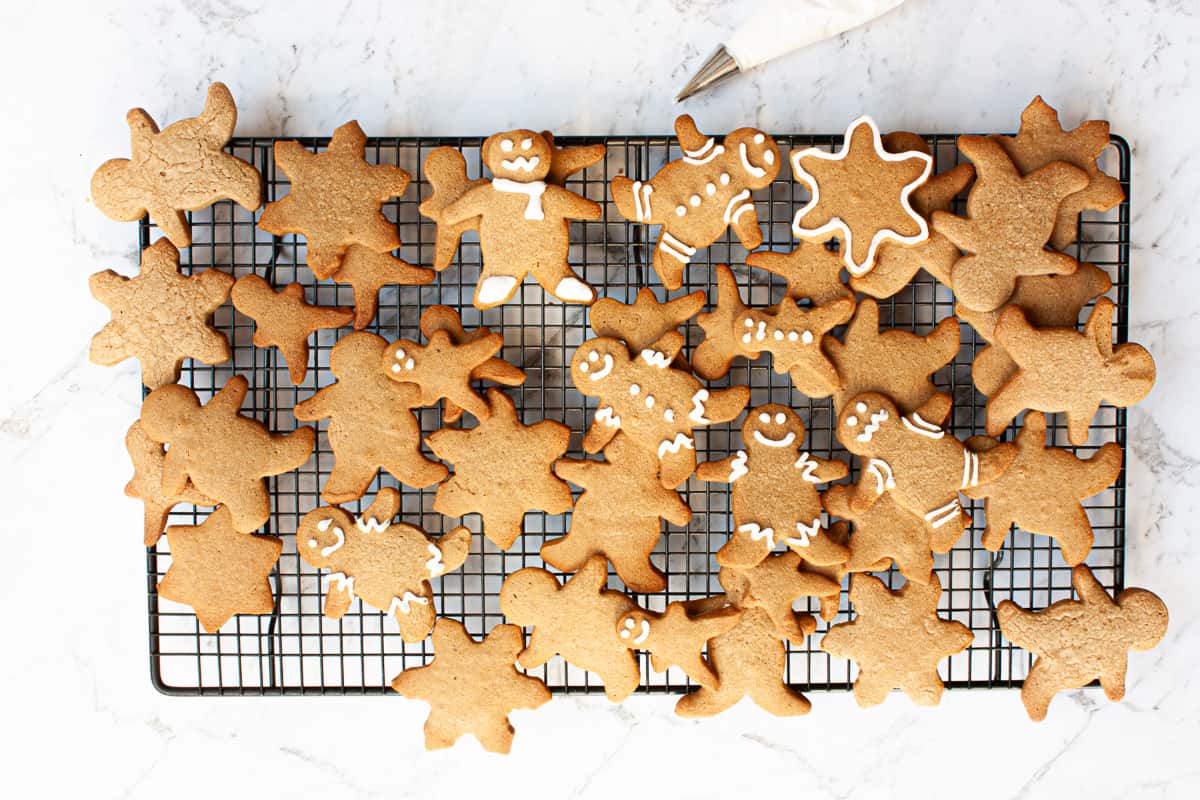
Feel free to get creative with the shapes - cute people, numerals for kids birthdays, stars, whatever you like. You could even make simple squares if you're looking to save time. You can make edible hanging decorations with them. Simply thread ribbon through holes pressed before baking. This recipe is ideal for constructing sturdy gingerbread houses. The cut-outs will maintain their shape without spreading. The walls and a roof will fit together with straight edges.
You can chop these biscuits to make a gingerbread streusel (crumb). Great topping for desserts such as trifles or ice cream.
I top my rhubarb, custard and gingerbread trifles with roughly chopped gingerbread biscuits. It's a great textural contrast that mirrors the flavour of the soft ginger cake layer.
Kids love decorating these! You can buy mini squeezable coloured icing tubes which are great for little hands.
I like to be realistic. It's important to note that making gingerbread biscuits requires patience and time. While the dough is quick to prepare and the baking time is short, cutting out the shapes can take some time. Keeping the dough chilled is essential, as it becomes more difficult to work with when it warms up. You will need to divide the dough into at least two parts for easier handling. Be prepared to bake the biscuits in several batches, especially if you're re-rolling the scraps.
🥘 Ingredients
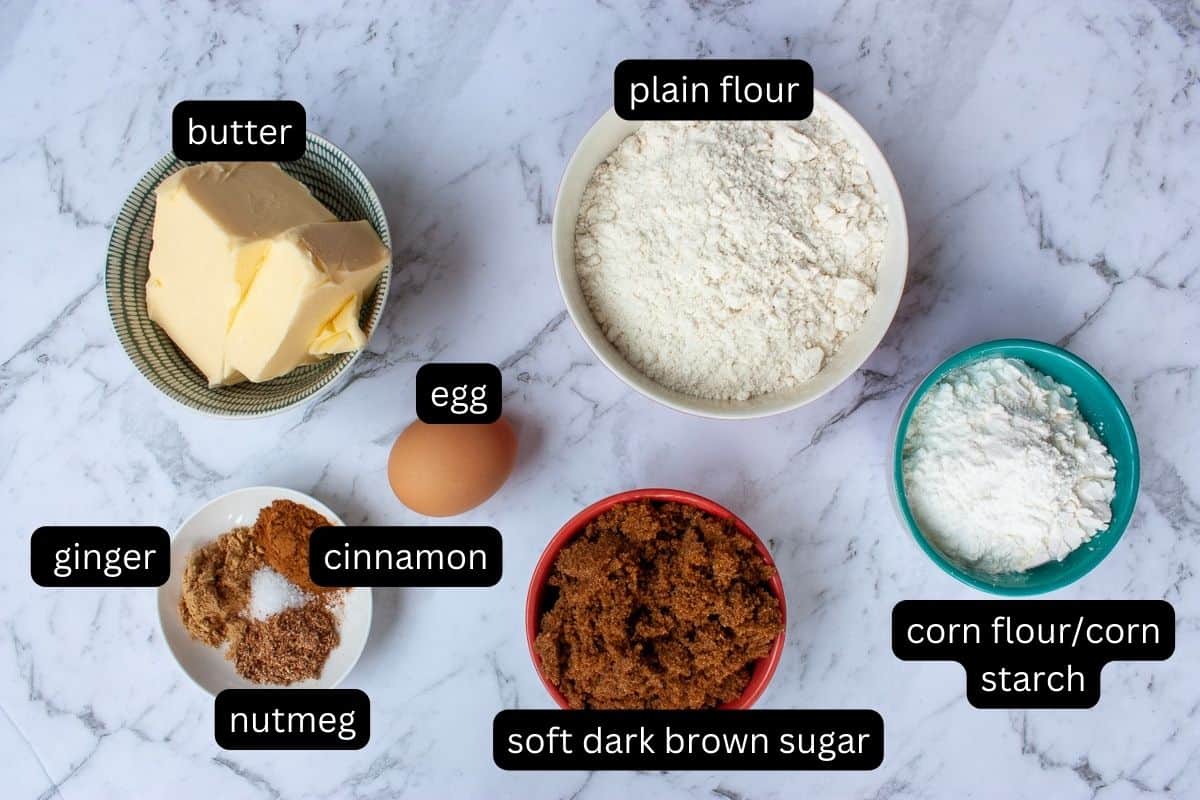
Cornflour/corn starch - replacing some plain flour with cornflour keeps the biscuits crisp. It also prevents them from spreading during baking.
Salt - random pops of salt are so nice in this sweet and spicy dough.
Spices - hefty amounts of ground ginger, nutmeg and cinnamon add warmth and fragrance. It's always worth grating whole nutmeg, rather than buying ready ground. Whole nutmeg is an absolute bugger to grate. They look and feel like tiny smooth oval bits of wood. Do your knuckles (and patience) a favour and invest in a nutmeg grinder. These are nifty little gadgets! Just put a whole nutmeg inside and crank the handle.
Soft dark brown sugar - used to add wonderful flavour, colour and texture to the biscuits. The high molasses content prevents the biscuits being too dry.
Note - there are no raising agents like baking powder or baking soda in this gingerbread recipe. These are crisp biscuits rather than soft and puffy.
🔪 Instructions
Making the dough
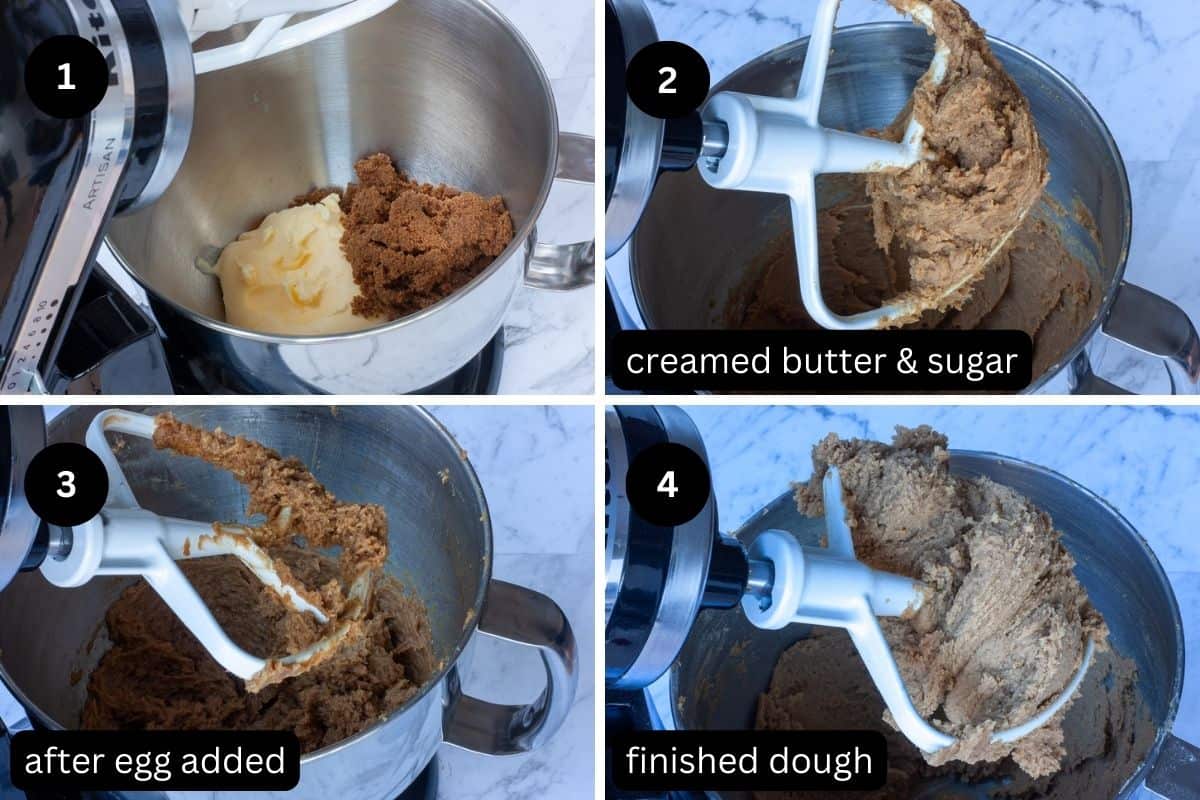
There's quite a lot of butter in the dough. It needs to be soft to combine with the other ingredients. We cream the butter with the sugar until they are well combined. There should be no streaks of butter visible and the mix will lighten slightly.
Sifting the dry ingredients serves to combine them. It filters out any bigger pieces of nutmeg that might have broken off when you were grating it. Sifting here is not to incorporate air like we might want to do for a fluffy light cake, for example.
We add the dry ingredients to the wet in four lots. Keep the stand-mixer speed low so that the flour doesn't fly everywhere. We want to avoid overworking the dough; mix sufficiently to combine but no extra. You'll need to stop and use a flexible spatula periodically to combine everything.
Rolling out the dough
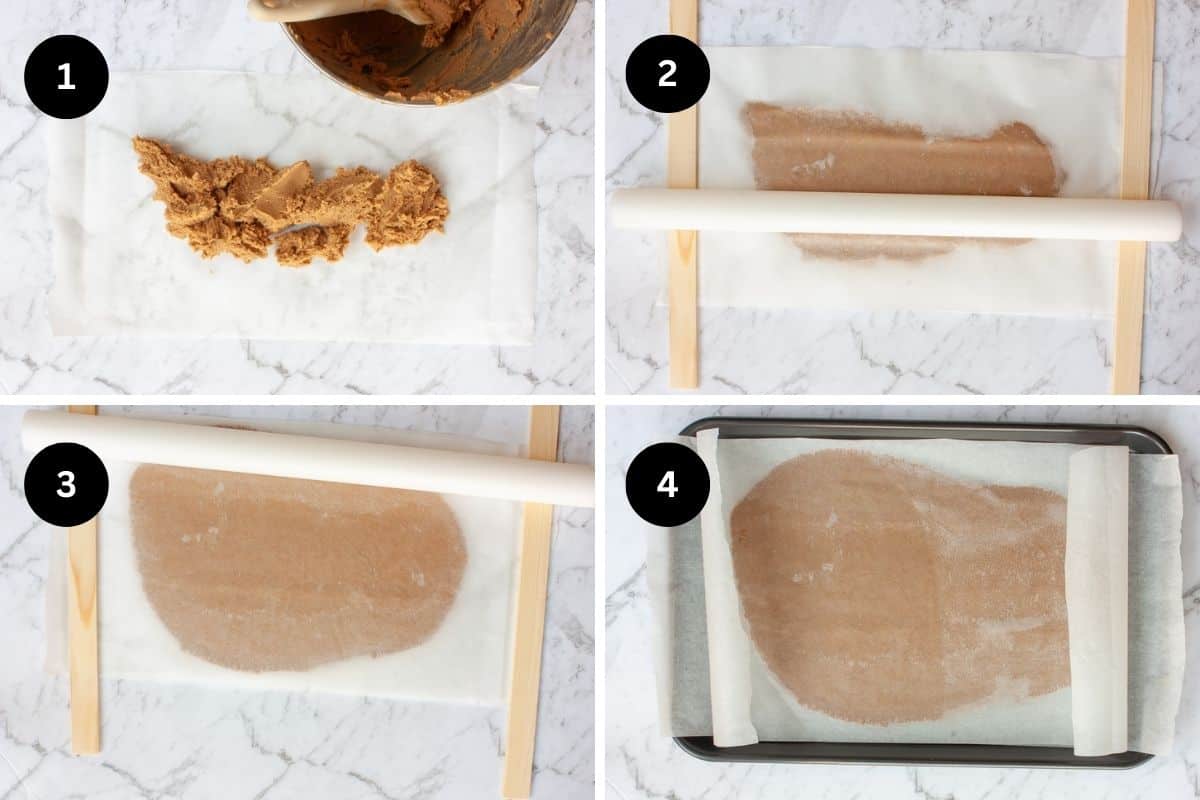
When first made, the dough is very soft, too soft to cut out shapes. You'll need to refrigerate it before cutting out the shapes. However, the softness makes light work of rolling out into a thin layer. I recommend doing this between layers of baking paper.
Rolling the dough between layers of baking paper means you:
- don't need to add extra flour to stop the dough sticking to the work surface
- can easily transfer the dough to the fridge to firm up before cutting
- keep your counters clean
Working with half the dough quantity at a time, you can pile it on a sheet of baking paper cut to fit your baking tray. Cover with another sheet. Press out with the palms of your hands first. 'Tame' the dough so that it doesn't ooze out the sides. You can lightly cut away errant bits and press them elsewhere where there's space. 5mm thick is about right. A handy tip is to find a couple of things that are 5mm high to roll the dough in-between. The ends of your rolling pin will rest on these and keep the thickness of the dough consistent.
Chill the dough
Put your dough layer in the fridge for around 20 minutes to firm up before cutting out your shapes. If the dough's too cold the shapes will be brittle and easily break. Too warm and the dough will be sticky and hard to work with.
Cut out shapes
There are three ways you can cut out your biscuits:
The dough softens quickly due to the high butter content. This can make it tricky to cut out the biscuits without distorting them. Once you've cut the biscuits and laid out on the baking sheet, don't try to move them. You don't need to allow much space between the biscuits; they won't spread.
- Reverse cut-out - excess dough is removed from around the biscuits, rather than lifting the shapes out. This is great because you don't have to move the shapes. Mark out your shapes. Peel the scraps from around them. You might need to use the tip of a knife to remove the dough from between them if it doesn't lift off in one go.
- Cutter Lift - if the dough is 'Goldilocks'-temperature, the shape will lift out inside the cutter. You can gently push it out without distorting it onto a lined baking sheet. This gives the neatest cut-outs with sharp edges. The dough needs be quite cold to do this. You'll need to work with small sections of the dough and work quickly.
- Transfer - mark out the shapes and use a flat thin utensil to lift them to transfer to a lined baking sheet. Or you can pick up and flex the baking paper to gently pop it out into your hand.
I usually end up using a combination of methods, whichever works, right? Whichever method you use, the dough has to be chilled and you need to work fairly fast. If the dough is getting too soft and sticky, don't stress. Re-roll out between layers of baking paper and return to the fridge for at least 30 minutes.
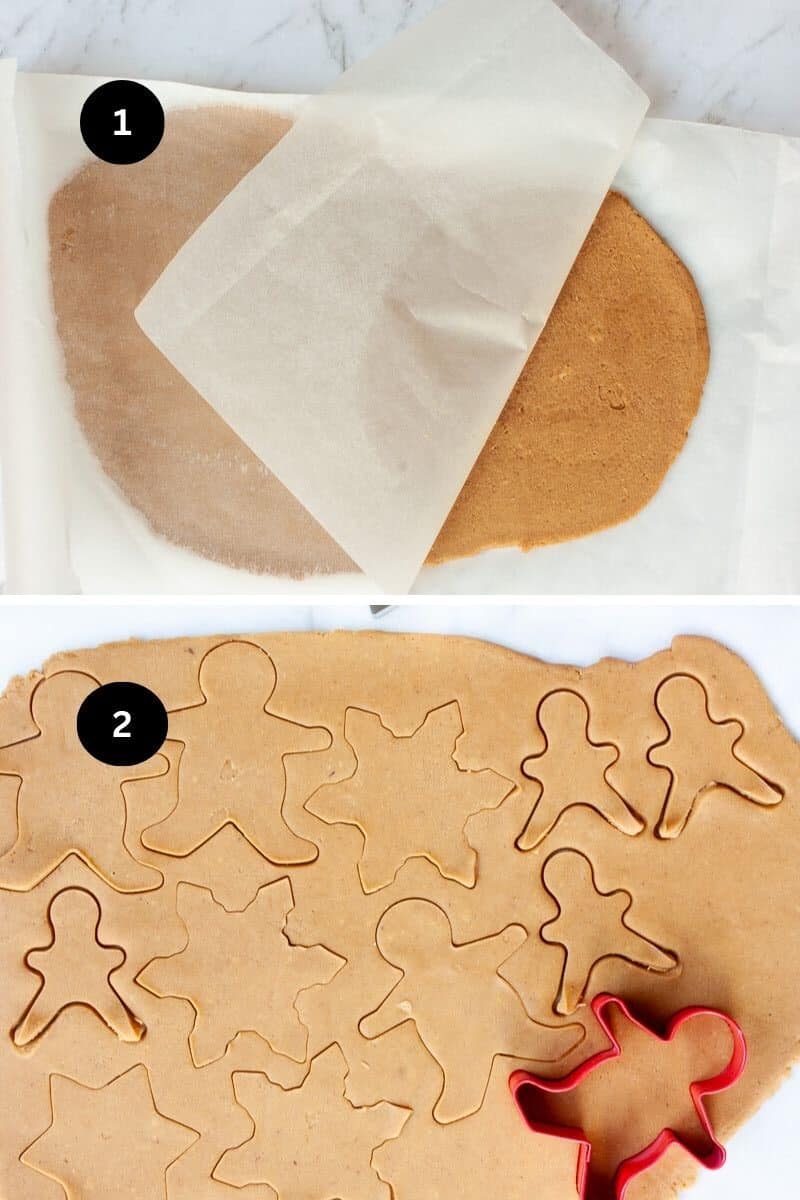
If the edges are a bit raggedy, you can reshape slightly with the tip of a butter knife or your fingers.
If you're making hanging biscuit decorations, use the tip of a piping nozzle or a similar tool to press out small circles before baking.
You don't have to chill the biscuits before baking. But you will get more consistent results if you cook the biscuits from the same starting temperature. Depending on the size of your baking sheet, the biscuits on it may have been cut from different dough rolls. Let them all chill to the same temperature before baking.
Baking
Bake for 10-12 minutes, depending on thickness and desired crispness. A shorter bake time will result in a softer biscuit. Regardless, they will be soft straight out of the oven. If making these for the first time, allow the first batch to cool before baking any more. See whether you're happy with the crispness and adjust for the next batch if desired.
Decorate
If you want to decorate these, I've given a recipe for royal icing. This sets hard and brittle. It won't make your biscuits soggy and you'll be able to stack the biscuits once the icing is dry. You can customise with colouring or flavouring. Also, if you're concerned about consuming raw egg, there's no need to worry. The sugar effectively 'cures' the egg.
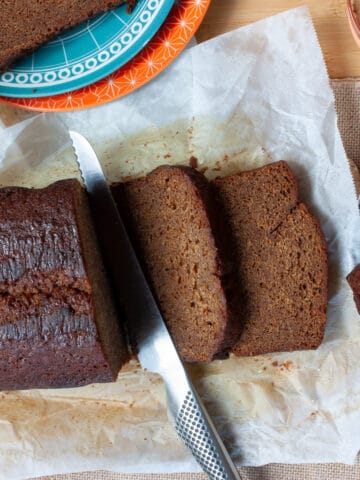
If you're as obsessed with ginger-forward flavours like I am, you might also like my ginger cake recipe. It's basically gingerbread biscuit flavour in a gooey, cake version.
📖 Recipe
Equipment
- 2 baking sheets
Ingredients
- 225 g unsalted butter (softened)
- 170 g soft dark brown sugar
- 1 egg
- 250 g plain flour
- 90 g cornflour/corn starch
- ¼ teaspoon salt
- 1 ½ teaspoons ground ginger
- 1 ½ teaspoons ground nutmeg half a whole nutmeg
- 2 teaspoons ground cinnamon
(Optional) Royal Icing
- 15 g egg white about half the white of one egg
- 100 g icing sugar
- ⅛ teaspoon cream of tartar
Instructions
- Cream Butter & Sugar - put the softened butter and sugar in the stand-mixer bowl. Cream in a stand mixer fitted with the blade attachment at low-medium speed until well-combined with no streaks of butter. You will need to stop and use a flexible spatula to help it along.225 g unsalted butter170 g soft dark brown sugar
- Egg - whisk the egg into a small bowl. Add the egg to the butter and sugar. Blend until well-combined. Don't worry if it looks a little curdled at this point.1 egg
- Dry Ingredients - sift the flour, cornflour, salt and spices together over a large bowl. Tip roughly a third of this dry mix into the wet ingredients. Mix at low speed until combined. Use a flexible spatula to make sure all the flour is incorporated. Add the rest of the dry ingredients in two more batches.250 g plain flour90 g cornflour/corn starch1 ½ teaspoons ground ginger1 ½ teaspoons ground nutmeg¼ teaspoon salt2 teaspoons ground cinnamon
- Baking Paper - lay a sheet of baking paper on the work surface roughly the size of your baking sheet. Pile roughly half the soft sticky dough into the centre. Lay another sheet of baking paper over the top to sandwich the dough. Press on the dough with the palms of your hand to start to ease out.
- Roll Out - switch to a rolling pin. If the dough starts to get close to the edges of the baking paper, use a butter knife to gently slice off some dough to trim. Add this section elsewhere and roll out again between the sheets of baking paper to merge. Once you have finished rolling, drag the baking paper 'sandwich' onto the baking sheet. Transfer to the fridge for around 20 minutes (or longer is fine).
- Repeat Steps 4 & 5 - with the remaining half of the dough.
- Preheat Oven - to 160°C
- Cut Biscuits - remove one portion of dough from the fridge. Gently peel off the top layer of baking paper and use this to line the baking sheet. Cut out your shapes and lay on the baking sheet, allowing a little space between them. Don't move them now until cooked and cooled slightly. Repeat with the other portion of dough.
- Bake - 10-12 minutes.
- Re-roll Scraps - Combine the leftover dough from both batches. Re-roll to cut out more shapes as required, returning rolled out dough to the fridge again to firm up.
- (optional) Royal Icing - whisk the egg white and cream of tartar with an electric hand whisk until frothy. Add in the sugar little by little and whisk at low speed until incorporated. Thin the icing with tiny amounts of water (¼ teaspoon at a time - you might need 3 or so) to get the desired consistency for piping. You can add drops of colouring or flavour to customise. It doesn't seem like much, but it's plenty for this batch of biscuits. You can spoon into the corner of a small ziplock bag and cut a tiny bit of the corner off to improvise a small piping bag if you don't have a dedicated one.15 g egg white100 g icing sugar⅛ teaspoon cream of tartar




Comments