Chicago-style pizza is deep pan pizza on steroids. It's cooked in a deep pie dish or round cake pan, with dough lining the base and all the way up the sides. This paves the way for plenty of filling! This is not a fold-up-and-eat-with-your-hands type of pizza. This is more grab-a-knife-and-fork (and an eating partner). It's hard to find Chicago Pizza outside of Chicago. Luckily, we can replicate it at home (and it's not as hard as you might think). Homemade Chicago Pizza will become a family favourite, I promise you!
This recipe is adapted slightly from the amazing Sally's Baking Addiction. I've made a few alterations - I've increased the amount of flour in the dough a touch. The pizza sauce is my own recipe, which I love. It features in some some of my other recipes, such as Ratatouille Tian and Traditional Pizza.

👪 Serving size
This recipe makes two pizzas, enough to (very) generously feed four people. To be honest, I'm amazed afresh every time I make these (which is often!) how much Chicago Pizza my family can put away. They're at least on fortnightly rotation in our house by popular request. There are never any leftovers.
⏲️ Baking time
Whilst I won't pretend this is a 30-minute meal, it's not that tricky. It does require a bit of forward planning. I recommend starting the day before. Don't be put off by the length of this recipe. It's very detailed to make it easier to follow. I've tested it many times, coming back after a while and looking with fresh eyes....tweaking the instructions to make it crystal clear. Please let me know if you don't agree!
🥘 Ingredients
There is nothing fancy or hard to source in these Homemade Chicago Pizzas. You will find everything in an average supermarket. You probably have what you need already in your kitchen.
The base is pretty special - deep, puffy, soft and buttery. It makes a dreamy bed for all the toppings/fillings. It's also perfect for mopping up any extra sauce. We laminate (fold) the dough with butter (which sounds more complicated than it is). This makes for wonderful layers. We add a little polenta (cornmeal) for amazing colour, texture and flavour.
Chicago pizzas are famous for being filled 'upside-down'. I've no idea why (or whether this has got anything to do with how good they are). The cheese; a generous layer of stretchy mozzarella- goes underneath the other toppings. My version has crumbled bacon bits and thinly sliced pepperoni. My slightly sweet and slightly spicy tomato & basil sauce is perfect for these pizzas. They're topped with a generous smattering of parmesan cheese.
🔪 Instructions
- make dough. Rise in a warm place until doubled in size. This takes around an hour, depending on temperature.
- press out dough to a rectangle, spread with very softened butter and roll up. Divide dough and form two dough balls.
- transfer dough balls to the fridge for 1 hour (or up to 3 days!), until ready to bake.
- preheat oven to max. before baking. Allow the dough balls to relax for a short time at room temperature to soften the butter slightly.
- press dough balls out to rounds and line cake pans with them
- fill bases with sliced/grated mozzarella, crumbled bacon and sliced salami. Pour over Tomato & Basil sauce. Sprinkle over some grated parmesan cheese.
- bake for 15 minutes. Rest in the pans for 15 minutes before pulling out to serve. Enjoy with a simple green salad.
We knead our dough ingredients in a stand mixer. When ready, the dough will slowly fall from the dough hook when it's lifted up.
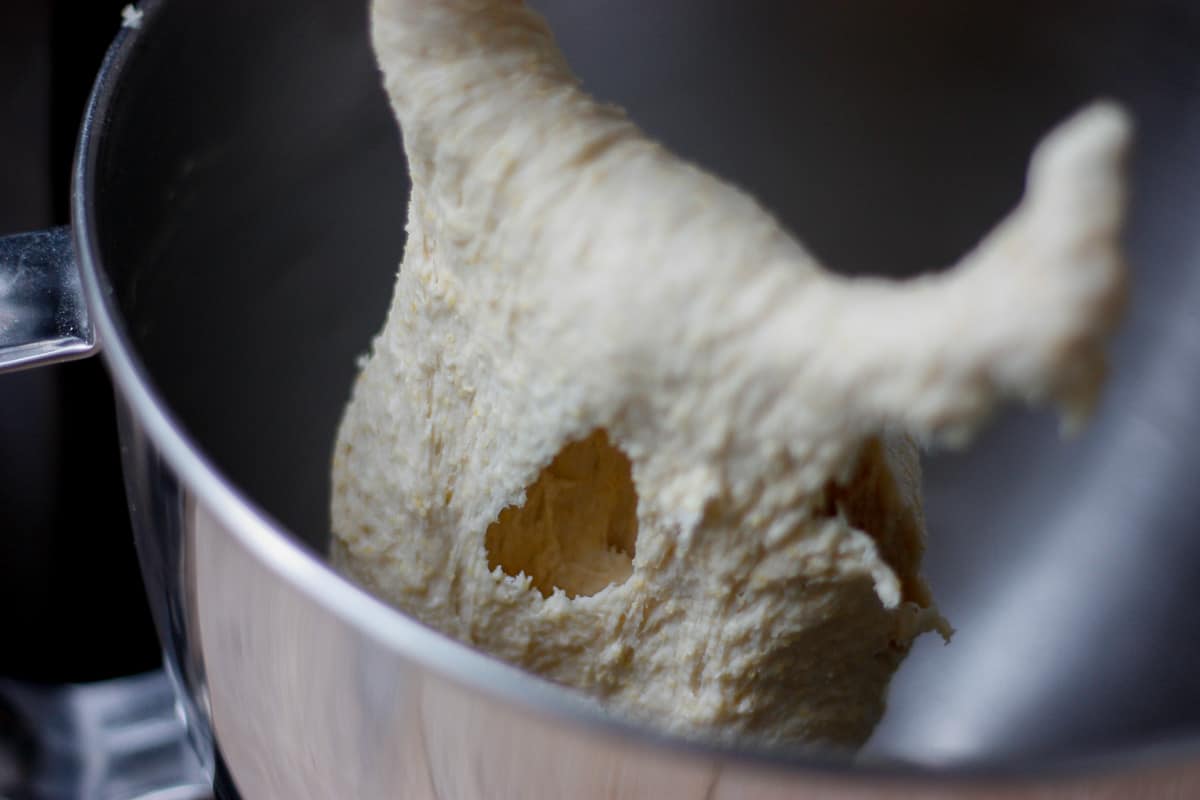
After kneading, the dough will be beautifully soft and a little sticky; slightly grainy with polenta. Scoop it out of the stand mixer bowl and gather it up with oiled hands into a ball. Place it in a well-oiled bowl. Loosely cover with plastic wrap and set in a warm place to double in size. This will take around an hour. It will take longer if the environment is colder, less time if it's quite warm in your house. Check in after 45 minutes, then every 15 minutes if not quite there yet. When ready, the dough will slightly spring back when you gently prod it with a finger.

Gently turn out the risen dough onto a lightly floured work surface. It will have a slightly honeycombed appearance.
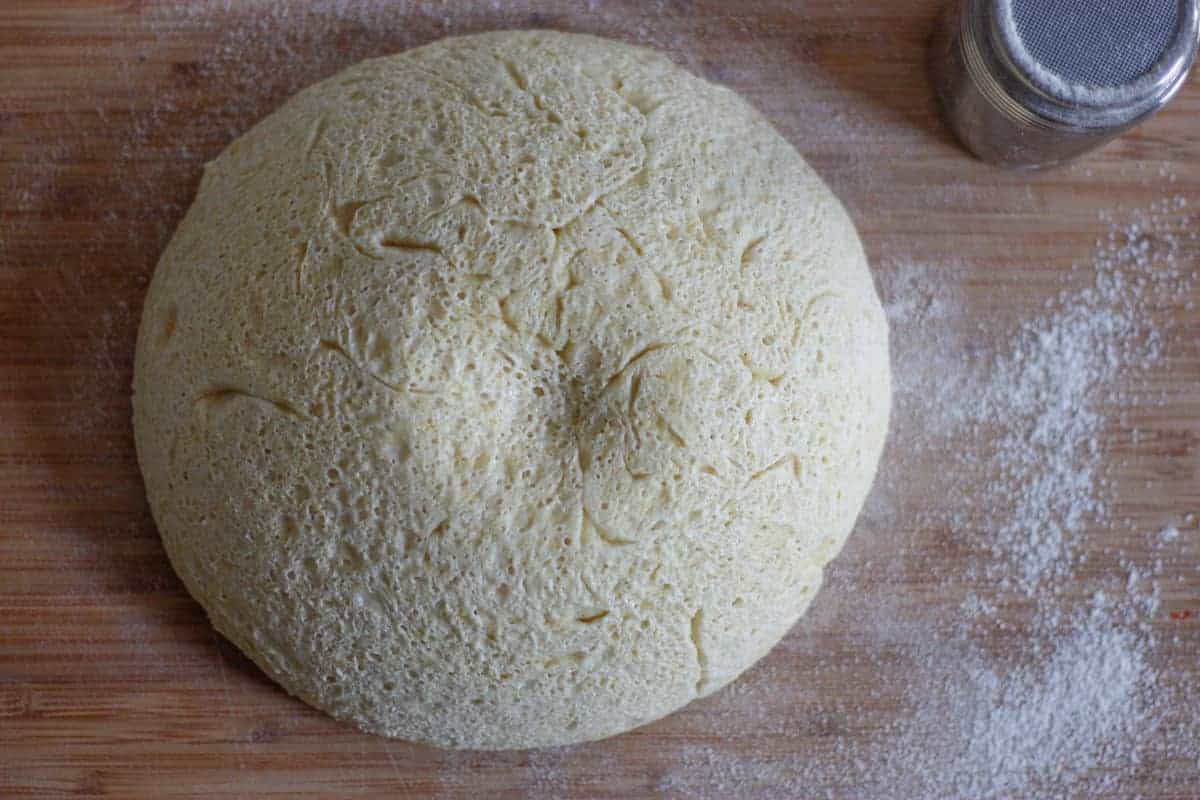
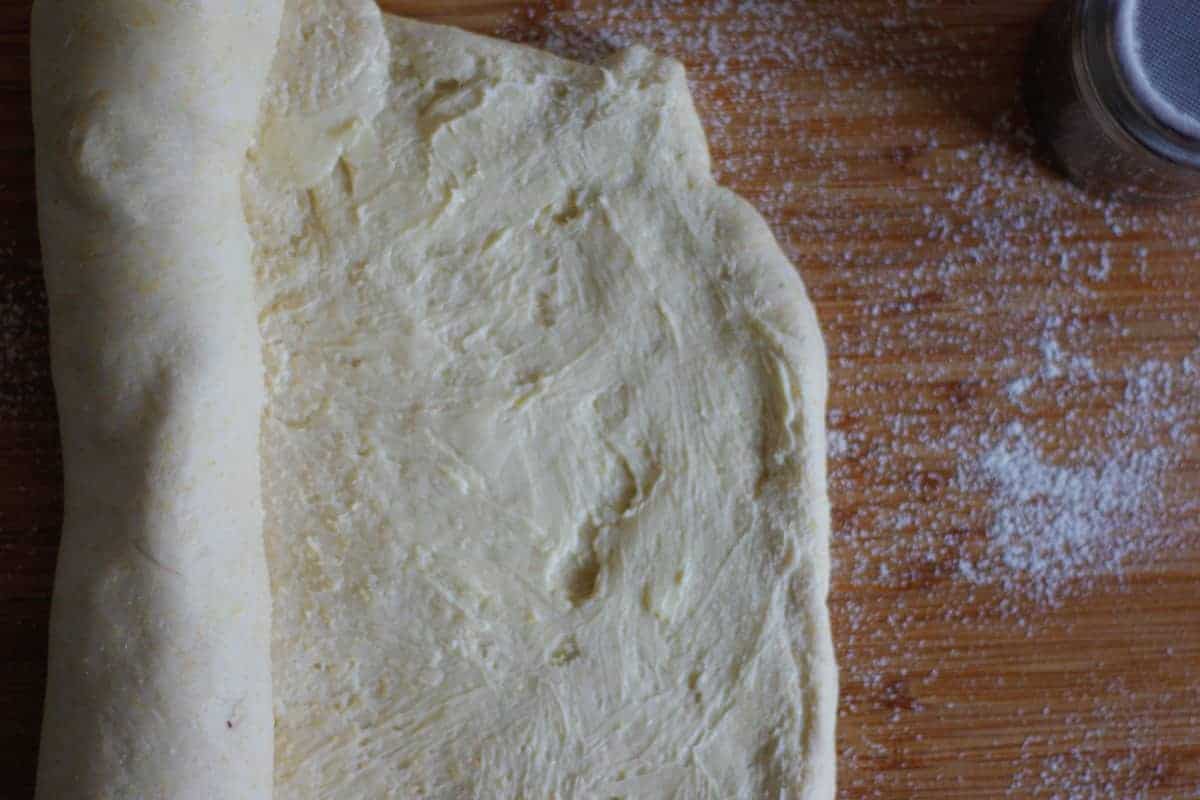
Press down on the dough to remove excess air bubbles. Spread the dough with really softened butter (fingers are best for this!), then roll all the way up from one of the short edges. Rolling from a short edge maximises the number of rolls (and the number of buttery layers). Traditional pizza doesn't have butter in it. This pizza is far from traditional (and that's not a bad thing here).
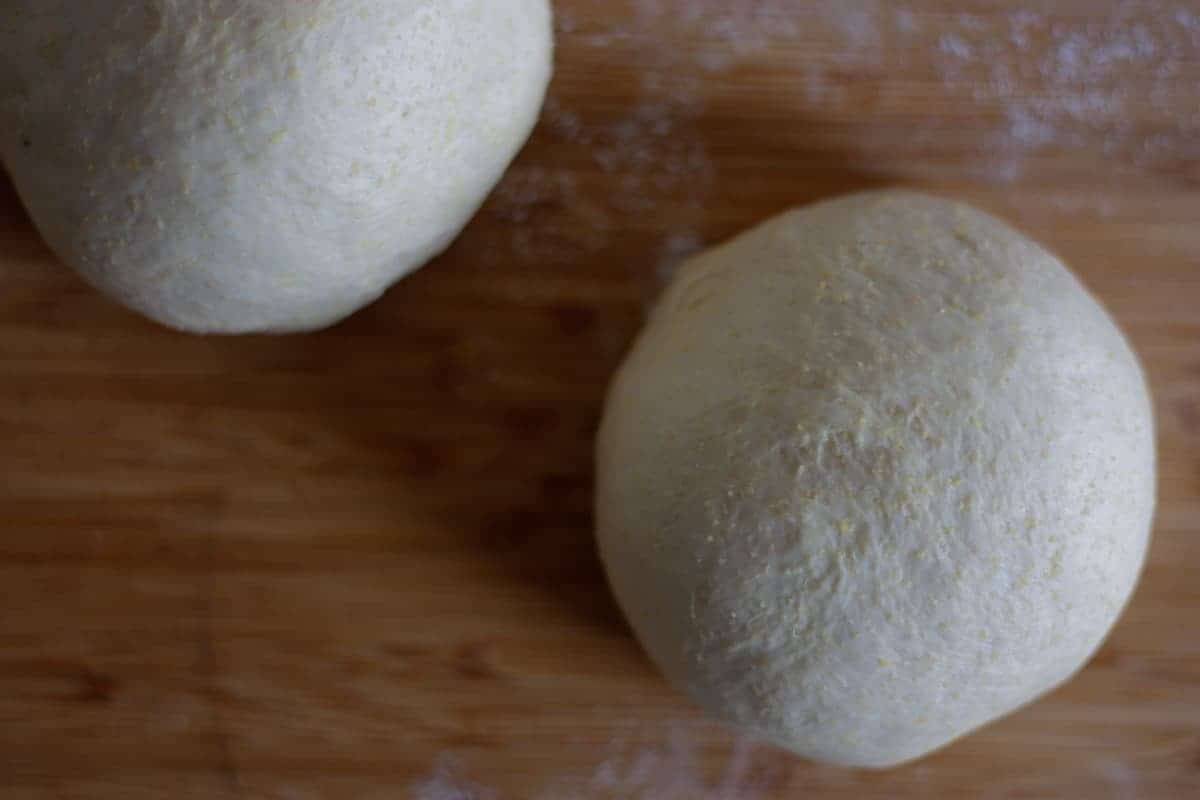
Cut the log in half and form a ball of dough with each. These dough balls are quite big and very soft. They're also very buttery. It's easiest to shape them in your hands rather than resting on the work surface. Work the cut ends underneath and pinch together to end up with a smooth ball. Place on an oiled sheet with a little space around them to allow for a little more growth. We spray the tops of the dough balls with oil. We loosely cover with plastic wrap to allow for a bit of growth, ensuring it is not exposed to air. Transfer to the fridge for at least an hour and up to 3 days.
Dough balls ready for the slow ferment in the fridge:
Get your oven on to max. temperature and your toppings/fillings ready before removing the dough balls from the fridge.
The best way to cook bacon - place finely chopped bacon in a cold frying pan with a couple of tablespoons of water (no oil required) and turn heat to medium. This renders the fat beautifully and you end up with evenly golden and crispy bacon. The photo below shows rashers of bacon. I now chop it first because I find it easier and less messy.

Allow the dough to rest for about 5 minutes at room temperature. Press each dough ball into rounds with your hands to line the cake pans. We want the butter in the dough to be warm enough that it doesn't pierce the dough when we press it out. We also want the butter to stay cool enough to melt once in the hot oven. This creates steam and, in turn, those beautiful layers. Brush the edges with a little olive oil.
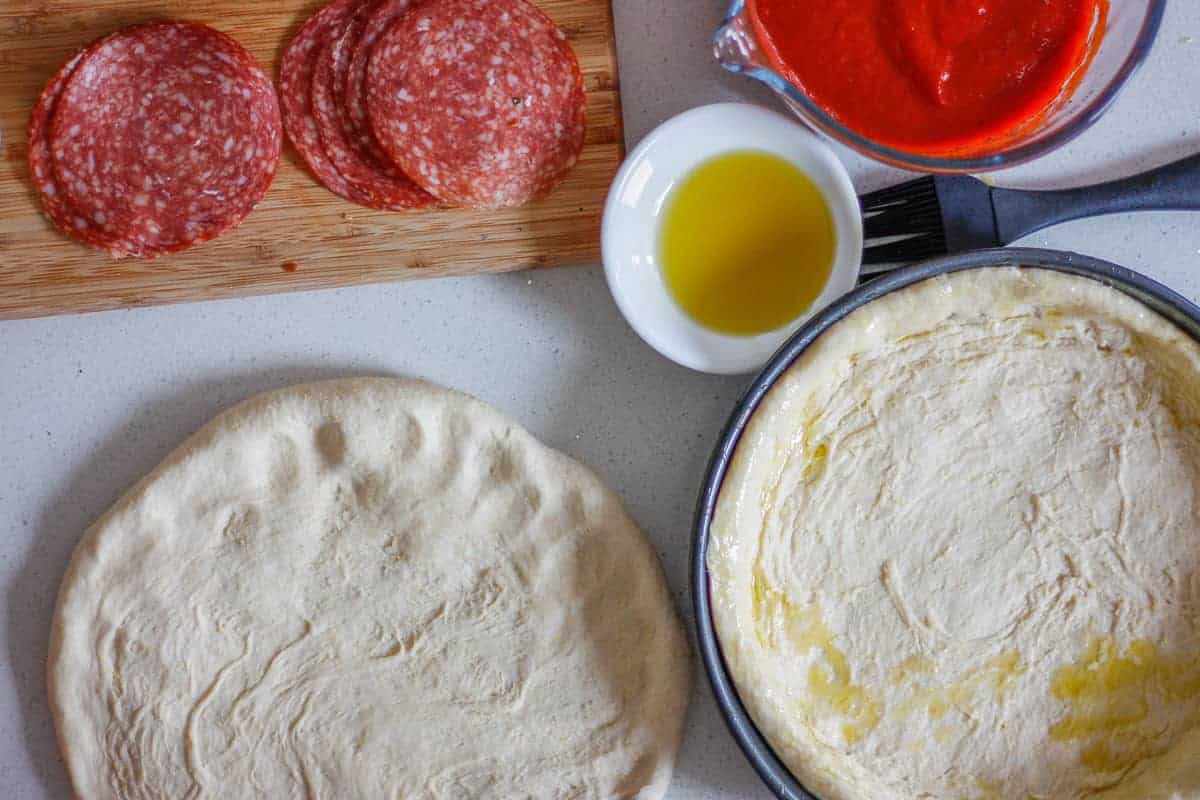
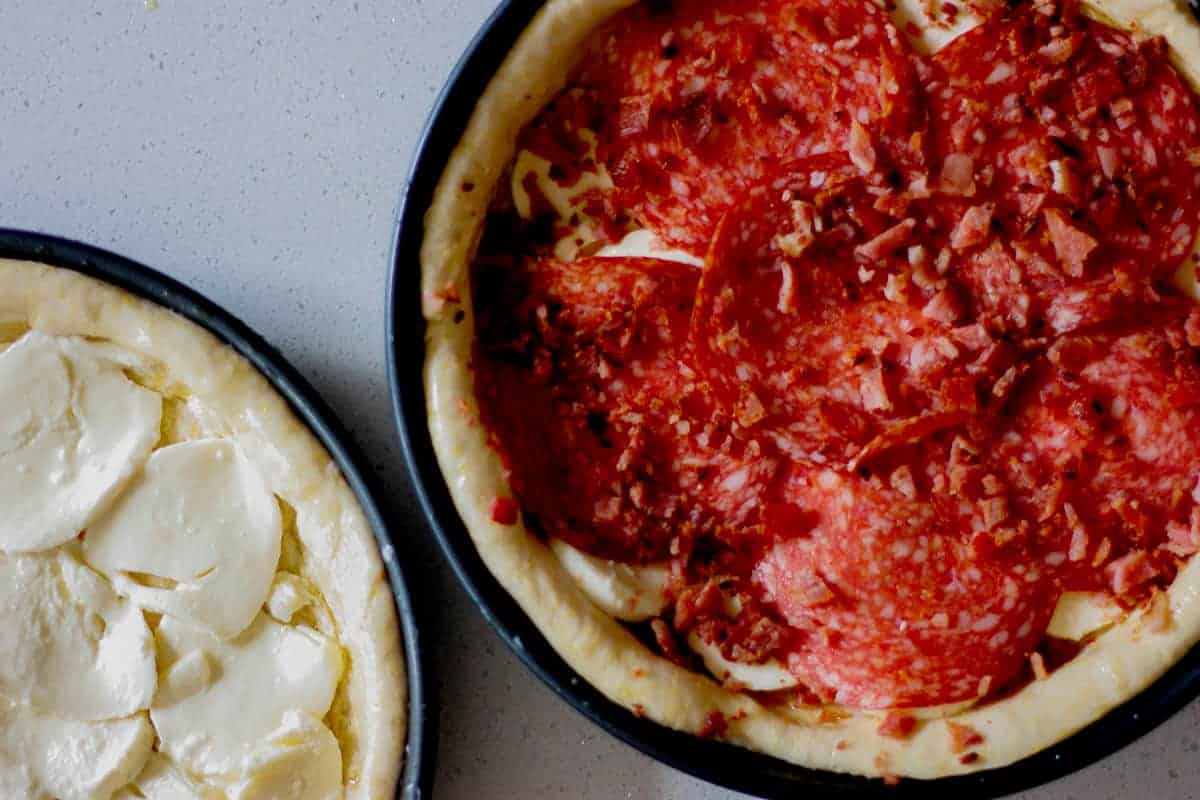
Line the bases with the sliced mozzarella, drying each slice between layers of paper towel as you go * Then share out the pepperoni slices and crumbled bacon bits.
*actually....buy the firm stuff that's not packaged in water. You can grate it on the big holes of a box grater. No drying required. This mozzarella is usually cheaper and just as good for this purpose. Save the fancy stuff for caprese salad.
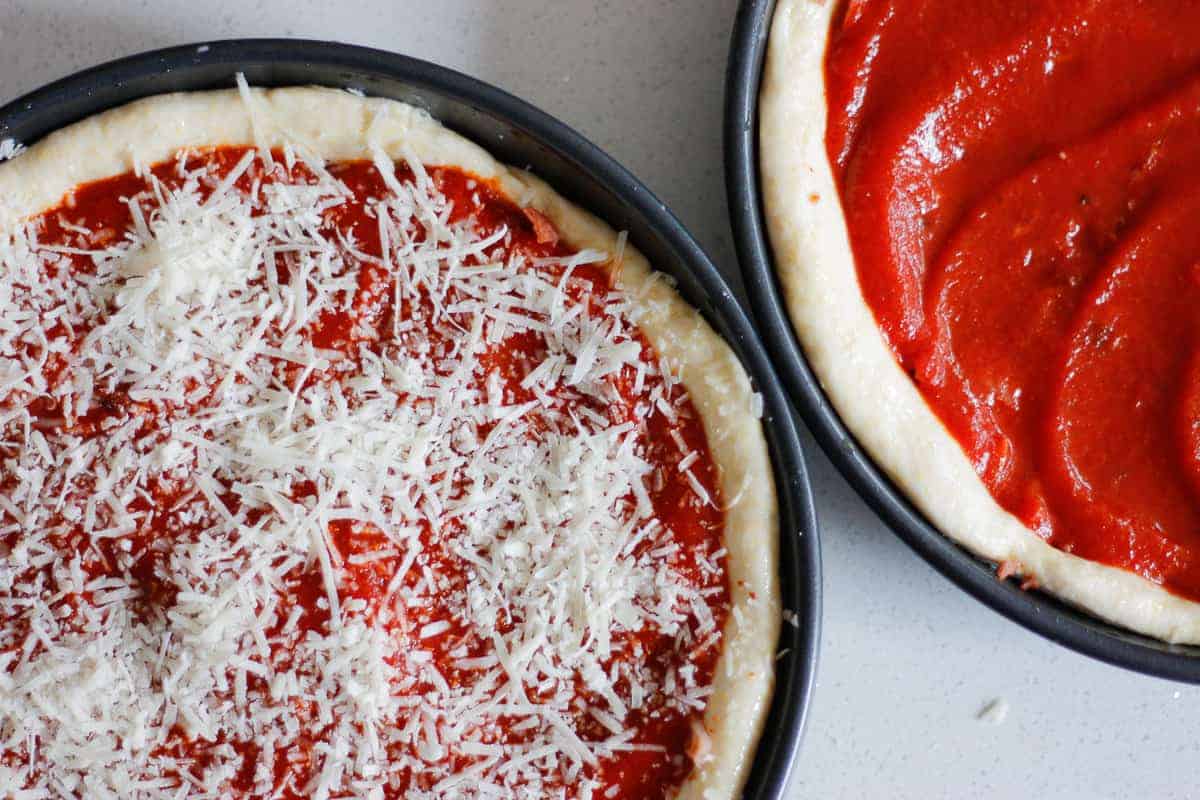
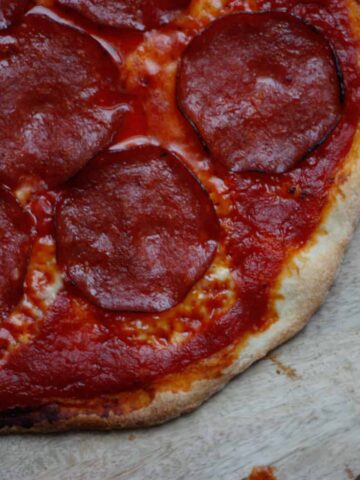
Add a layer of beautiful thick & rich tomato sauce. Finish with finely grated parmesan cheese. Bake for 15 minutes.
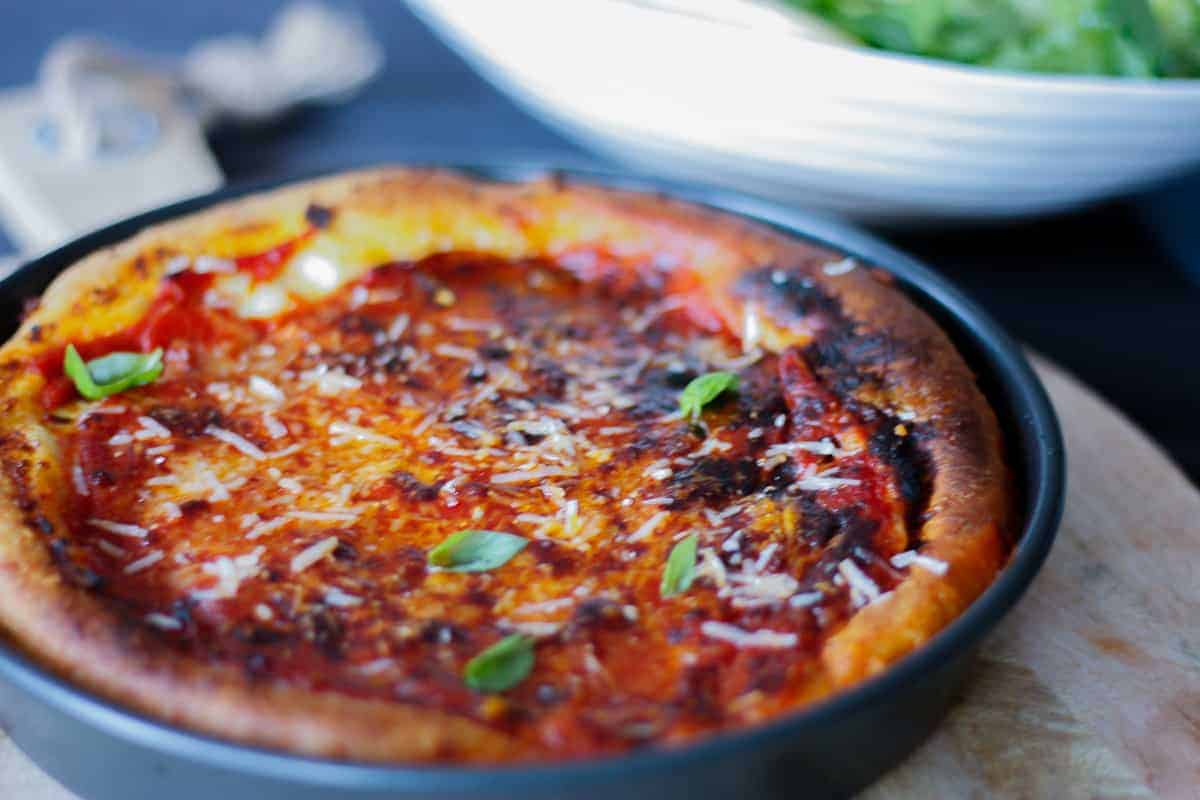
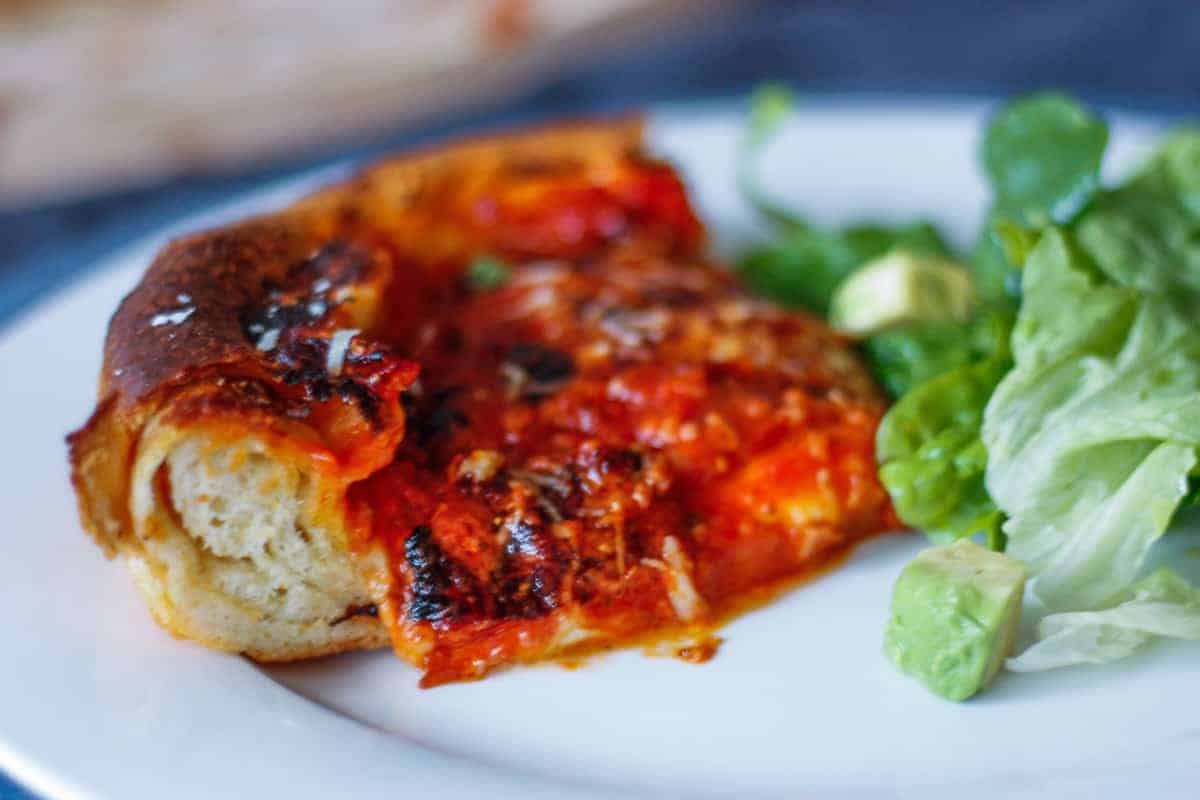
Allow the pizzas to cool in their pans for at least 15 minutes before pulling out to cut and serve. It's hard to wait, but you'll regret it if you try to slice them too early. Do that and the filling will pour out. In our house we wait 15 minutes before dragging one of the pizzas out of its pan, cut into quarters to share. Once we've finished the first pizza, we remove the second pizza from its pan and portion that. They will stay warm, don't you worry.
We pair Chicago Pizza with a simple garden salad. Sometimes just soft butter lettuce and avo cubes dressed with lemon-y olive oil. Sometimes old school iceberg lettuce, tomato and cucumber chunks.
❓FAQs
How long the first rise takes depends on the temperature and humidity of the environment you place it in. The optimal temperature is about 20°C. We want to encourage the yeast to grow and breathe, not kill it by too extreme a temperature. If you want to speed up this process, find the warmest room in the house or put the dough in the oven with just the light on. Of course, this only works if you're not planning on using the oven for anything else. Please don't forget the dough's in there! It's about the visual clues rather than any particular time limit - we want the dough to roughly double in volume. When you press a fingertip into the dough it will leave a slight imprint that will bounce back slightly. If dough is over-proved, the imprint will not retract at all. This isn't a deal-breaker, but you will find that the dough is a bit more floppy to work with and the end result will be a little less 'bouncy'.
The fridge time really slows down the fermentation and maximises flavour. This means you can fit this Homemade Chicago Pizza into your schedule. Going out for the day? Get the first rise done early, then let the dough hang out in the fridge until you get back. I'll often make the sauce and dough first thing in the morning. From taking the dough out of the fridge to tucking into this delicious meal, we're talking 45 minutes.
This dough is so delicious, your eaters will forgive you if it looks a bit rough and ready. We're not talking French Patisserie here!
Some parts of the pizza base may be thicker than others - that's fine. It's very forgiving. You can reshape a little in the pan. If you went a bit thin and there's a hole, just drag a little of the surrounding dough to cover it up. The dough does grow a bit in the oven; you might prefer to cut off any overhang rather than double it up to make a thick edge.
Your dough log may not have been split exactly in half. That's OK. I prefer not to tidy them up to make them even (the buttery layers get disturbed and messy). Do your best and go with it. It doesn't matter if the crust of one pizza is slightly thicker than the other.
The most important thing is to make sure the sides are high. The level of the fillings can only be as high as the lowest side. We don't want the fillings to overflow or seep between the base and the pan.
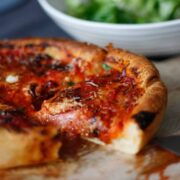
Check out the buttery layers in the crust!
📖 Recipe
Equipment
- 2x 23cm (9 inch) cake pans
- Stand-mixer
Ingredients
Pizza Dough
- 100 g unsalted butter
- 460 g plain flour
- 2 ¼ teaspoons instant dried yeast 7g
- 60 g polenta
- 1 ¼ teaspoon salt
- Tablespoon granulated sugar
- 300 ml lukewarm water
Toppings (for both pizzas)
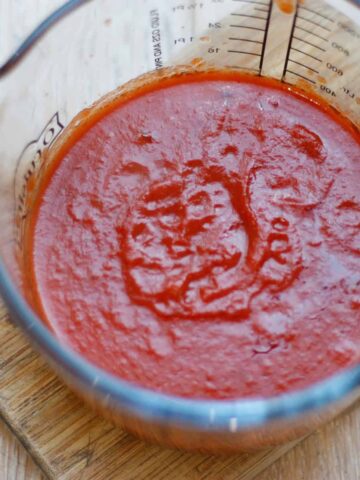
- Tomato & Basil Sauce (or 400ml of any good quality pasta/pizza sauce)
- 100-115 g smoked streaky bacon, about 4 rashers
- 70 g pepperoni (thinly sliced)
- 375 g mozzarella (note)
- 45 g parmesan
- extra olive oil
Instructions
Make the Dough
- Butter - melt HALF the butter (50g) and allow to cool slightly. Leave the remaining 50g butter to soften to room temperature for later.100 g unsalted butter
- Dry Ingredients - using a fork or hand whisk, combine the flour, yeast, polenta, salt and sugar in a stand-mixer bowl.460 g plain flour2 ¼ teaspoons instant dried yeast60 g polenta1 ¼ teaspoon saltTablespoon granulated sugar
- Wet Ingredients - add the lukewarm water and cooled melted butter to the dry ingredients. Combine using a flexible spatula so that it comes together into a craggy dough.300 ml lukewarm water
- Knead Dough - using the dough hook attachment on low-medium speed, knead for about 4-5 minutes. The dough will end up soft and supple and starts 'slapping' around the sides of the bowl. It will stick a little to the bowl in a small area directly under the dough hook. When you stop and lift the dough hook, the dough (really) slowly 'drips' off (note).
- Dough Ball - liberally line a large bowl with olive oil (either using your hands or a spray). Oil your hands. Get the dough out of the stand-mixer and form a large ball. The dough will be very soft and quite sticky. Place the dough ball in the bowl, turning to coat in the oil.
Warm Rise
- First Rise - cover the bowl loosely with plastic wrap or a clean shower cap. Allow to rise in a warm environment for around an hour, until roughly doubled in size. It's about the visual clues rather than any particular time limit - we want the dough to roughly double in volume. When you press a fingertip into the dough it will leave a slight imprint that will bounce back slightly. If dough is over-proved, the imprint will not retract at all. This isn't a deal-breaker, but you will find that the dough is a bit more floppy to work with and the end result will be a little less 'bouncy'.
- Baking Sheet - spray/rub a large baking sheet or tray with a little oil.
- Press Out Dough - tip the dough out gently onto a lightly floured work surface. Gently press down on the dough with your palms to remove any big air bubbles. Ease out to an evenly thin large rectangle roughly 30×20cm.
- Laminate - gently spread the very softened butter evenly over the whole top of the dough with your fingers. Roll up the dough rectangle from one of the short sides into a log shape.
- Divide & Shape Dough - cut the dough log in half along the length to make two equal-sized rods (no need to be exact). One at a time, pick up each dough portion and bring the ends underneath to meet. Shaping in your hands, gently gather up and pinch together any seams underneath to form a smooth ball. Place each ball on the baking sheet with some space between and around them.
- Cover - spray/drizzle the tops of the balls with oil and cover generously with plastic wrap. Seal well around the tray at the edges to keep the dough from drying out.extra olive oil
Cold Rise
- Second (Cold) Rise - allow to puff up and relax in the refrigerator (not in a warm place) for at least 1 hour (note) . They will flatten and relax slightly.
Fill & Bake
- Preheat Oven to Max. - at least an hour before baking the pizzas.
- Prep Fillings - finely chop and fry the bacon (note). Coarsely grate the mozzarella on the largest holes of a box grater. Finely grate the parmesan.100-115 g smoked streaky bacon, about 4 rashers70 g pepperoni375 g mozzarella (note)45 g parmesan
- Prepare Base - take the dough balls out of the fridge for 5-10 minutes to allow the butter to soften slightly. On an unfloured work surface, press (don't pull and stretch) one of the dough discs into a larger flatter disc using your palm of your hand, moving from the centre outwards. We want it to be big enough to line one of your cake pans, about 30cm diameter. Try not to make too much bigger than you need for lining the base and up the sides with no overhang. Doubled-up crust gets a little thick. You can use a dinner plate as a guide.
- Line Tin - gently drape the dough circle over the back of your hand to transfer to a cake tin (no need to grease the pan first). You can reshape the dough a little in the tin. If you went a bit thin and there's a hole, drag a little of the surrounding dough to cover it up. If part of the side is a bit low, press along the base and up the sides to work it higher. Repeat with the other dough ball.
- Oil Edges - brush the rim of the dough with a little olive oil. This is easier to do before filling.extra olive oil
- Fill Pizzas - share the grated mozzarella between the bases. Share out the bacon bits and pepperoni slices. Pour over the tomato sauce (there should be about 200ml per pizza). Use the back of a spoon to spread out to cover the ingredients underneath. Finally, sprinkle with the finely grated parmesan. The pizzas won't be filled to the top, but the topping will rise up as the pizza base puffs up.Tomato & Basil Sauce (or 400ml of any good quality pasta/pizza sauce)
- Bake -for 15 minutes, until the crust is well-coloured, and the tomato sauce is bubbling hot.
- Rest - remove the pizzas from the oven and allow to cool in the pans for 15 minutes before removing.
Comments