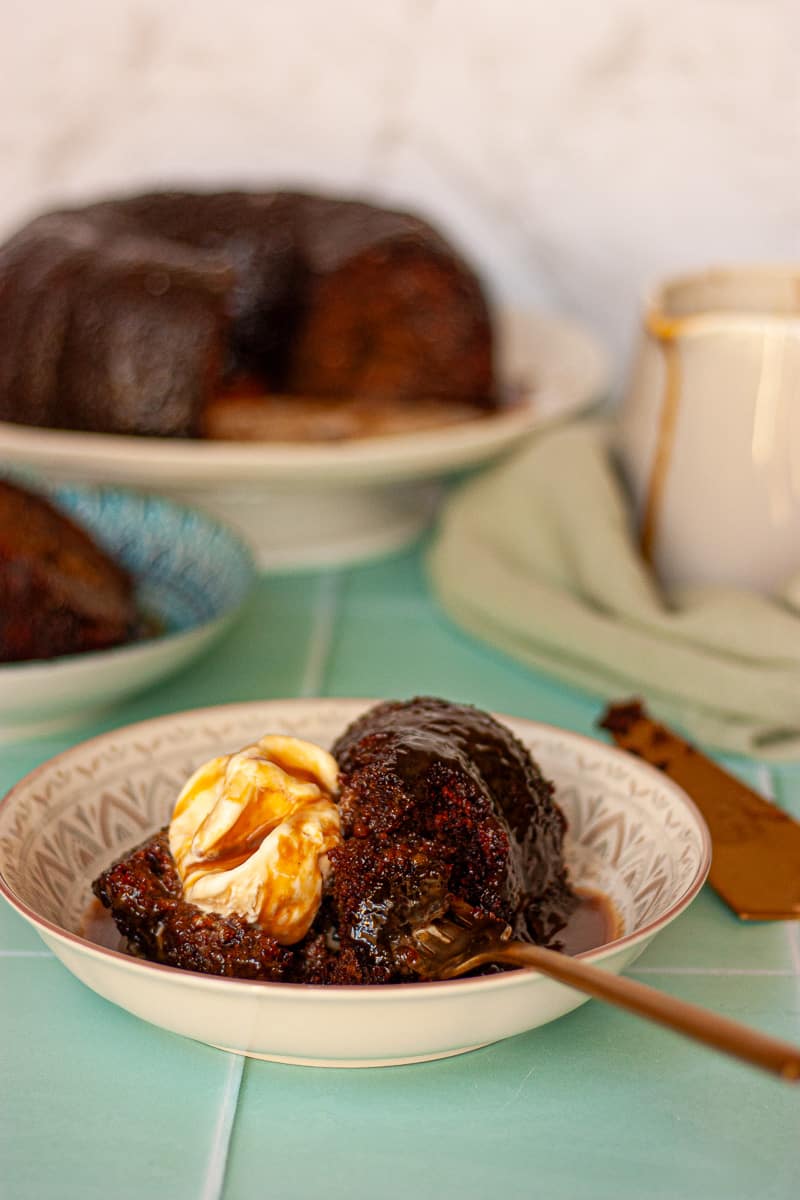
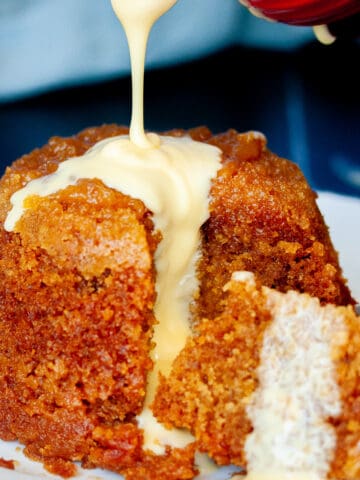
Sticky date (toffee) pudding is a warm, comforting dessert that's a timeless favourite.
It features a rich, moist, date-infused cake and a butterscotch (caramel) sauce. It's sweet and sticky, but also punches you in the face with nuanced flavour. Not for the faint-hearted! This dessert is for sweet-tooths who love their puddings.
Called sticky date pudding (in Australia/New Zealand) or sticky toffee pudding (in the UK). Same pudding, different name. Although this dessert is a British invention, the Aussies have got the name right. This classic treat features dates pureed into cake batter. This lends a natural sweetness and stickiness.
Jump to:
This might be the only way you ever eat dates, and that's OK. If you think you're not sure what dates are, I bet you've seen them before. You've probably come across them in Christmas foodie hampers. You might have seen them on a cheeseboard with other dried fruits.
😋What's so good about this sticky date pudding recipe?
- easy to prepare with no complex techniques.
- you can make it in less than 90 minutes from start to finish.
- we brush caramel sauce over the warm cake. This makes it extra delicious and look incredible. Extra sauce for serving of course!
- show-stopping bundt tin presentation is perfect for special occasions. Don't have a bundt tin? Don't worry - I've given 'normal' cake pan dimensions in the recipe card below.
- great for a crowd; this makes 16 generous portions. Don't want to make so much? I've given cake pan dimensions for a half quantity (8 portions) in the recipe card below.
- freezes and reheats like a dream. Perfect make-ahead dessert. Which means you'll wish you made big one (see point above).
- one of the most popular desserts. Most people love it!
- a dollop of vanilla ice cream is the perfect accompaniment. Hot-cold desserts are the best!
❓What's a bundt pan?
A Bundt pan is a special kind of cake pan that makes cakes look a bit fancy 😉 It's round and has a hole in the middle. The inside of the pan has lines or patterns which add to the design and help it bake evenly.
🥘 Ingredients
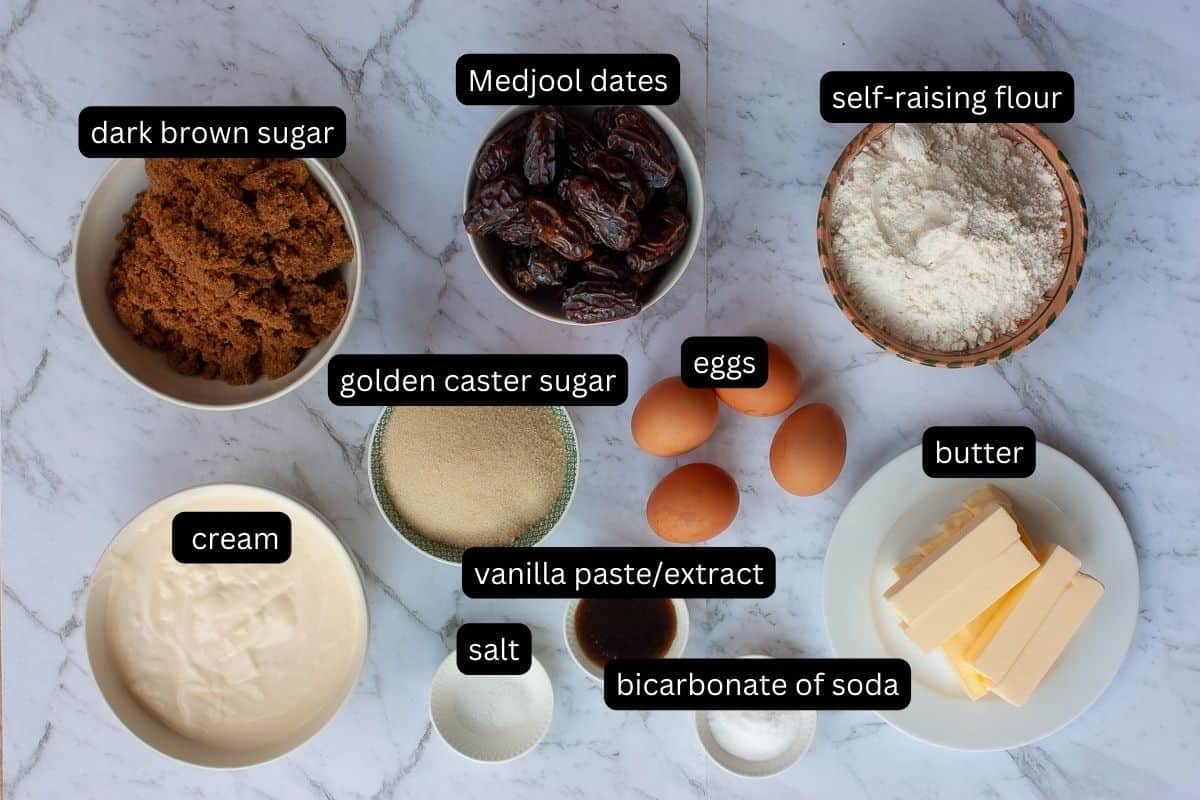
Dates - fruit of the date palm tree, native to the Middle East and North Africa. Well-known for their sweet taste and chewy texture. Typically oval-shaped. When ripe, they usually have a wrinkled appearance. They range in colour from bright red or amber to dark brown, depending on the variety.
Dates are nutrient-rich. They are also naturally high in sugar, in the form of glucose and fructose. They are NOT suitable for a low FODMAP diet. That is unless you stick to a single fruit 😊 To be honest, I eat this and suffer the consequences. It's worth it. You often see dates added into 'no sugar' muesli bars, or bliss balls, or smoothies. Dates are usually found dried, rather than fresh. Packets of dates often won't even state that they're dried, but they usually are. Dried Medjool Dates are a variety of dates prized for especially rich, sweet, and caramel-like flavour.
Golden Caster Sugar - caster sugar is granulated sugar that has been more finely milled. This makes it easier to dissolve into the wet ingredients in the batter. Golden caster sugar is less refined than normal (white) caster sugar. This gives it a more caramell-y taste that is not only sweet. If you don't have/or want to use golden caster sugar, you can replace with normal (white) caster or granulated sugar.
Vanilla Paste/Extract - either form is a convenient way of adding vanilla flavouring. Easier and cheaper than scraping out the insides from whole vanilla beans. Make sure you use natural flavouring for better flavour.
Self-Raising Flour - plain/all-purpose flour that already has raising agents added for convenience. This way you don't have to add them separately. If you don't have, replace with the same weight of plain/all-purpose flour and add 2 ½ teaspoons of baking powder.
Bicarbonate of Soda - also called baking soda. Please don't confuse with baking powder, which is a different raising agent. We add this to the dates to help soften the skins. It helps to stop the dates sinking to the bottom of the cake. It also helps lighten the cakes' texture.
Cream - called double cream, thickened cream or heavy cream, depending on where you're from. Any rich cream, 35-45% fat content will work well. Check out the fat content per 100g on the nutrition label to find this out. We use it to make the sauce smooth and rich. It provides a creamy texture and balances the sweetness. Make sure it is not sweetened.
Soft Dark Brown Sugar - brown sugar is the primary sweetener in butterscotch sauce. It adds sweetness and contributes to the caramel-like taste. The higher molasses content in soft dark brown sugar also gives the sauce its characteristic dark brown colour. Any brown sugar will work fine though.
🔪 Instructions
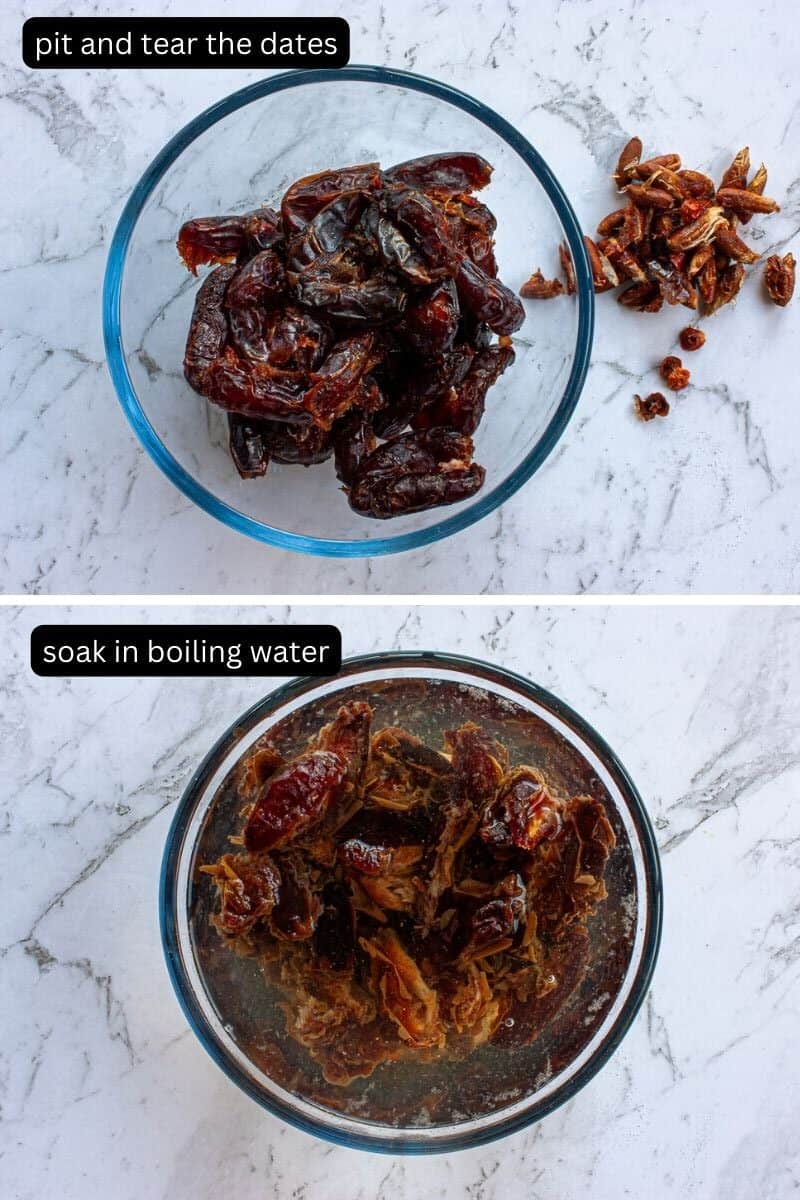
Dates - Pit & Soak
We de-stone/pit our dates and remove any stalk bits. Dates are extremely high in natural sugars and are very sticky! We pour boiling water over our date halves and leave to soften. Don't worry about the amount of time that the dates soak. All the soaking water gets added into the mix too, so you can't oversoak them. By the time you add the dates to other batter ingredients, they will have had enough time.
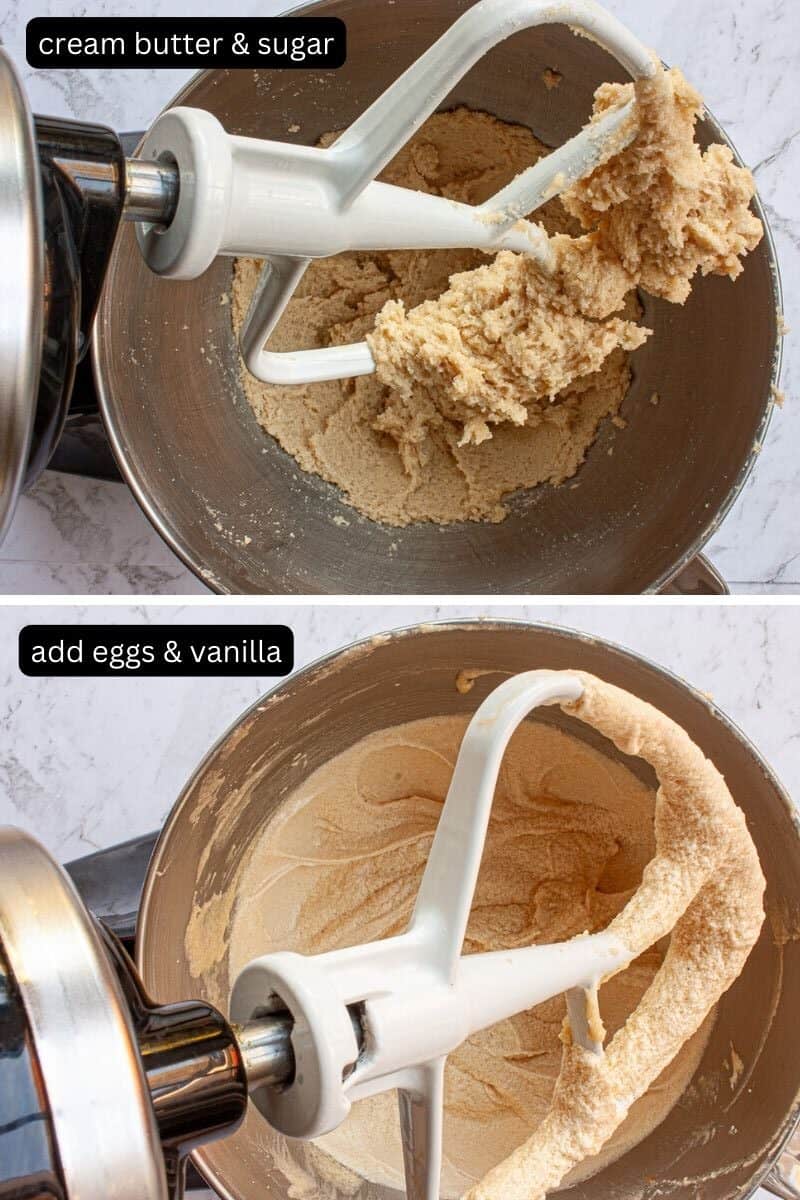
Cream Butter & Sugar/Add Eggs & Vanilla
We blend softened butter and sugar together until the mix is lighter and a bit fluffy. We add eggs and vanilla in stages until the mix is well-incorporated. It's easier to whisk the eggs together first, then add to the other wet ingredients.
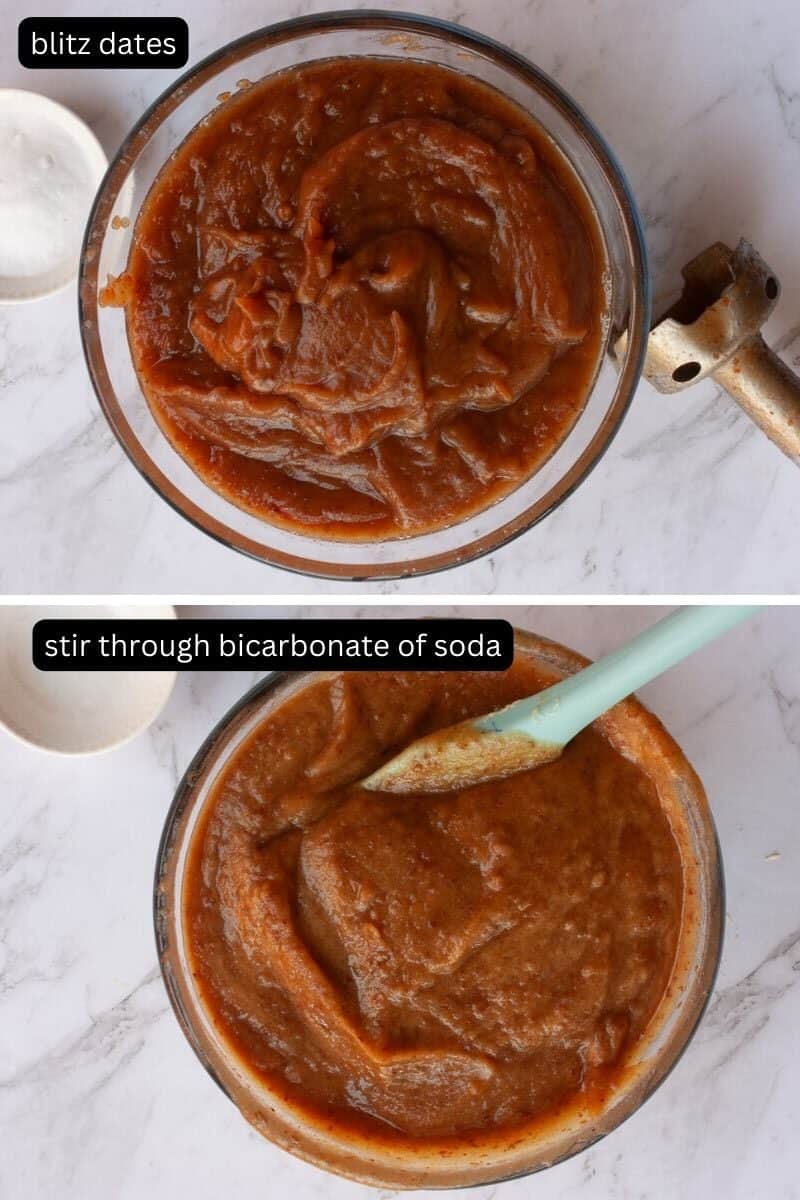
Blitz Dates/Add Bicarbonate of Soda
Sprinkle bicarbonate of soda over the dates and blend. The mix will lighten in colour and texture and foam up slightly.
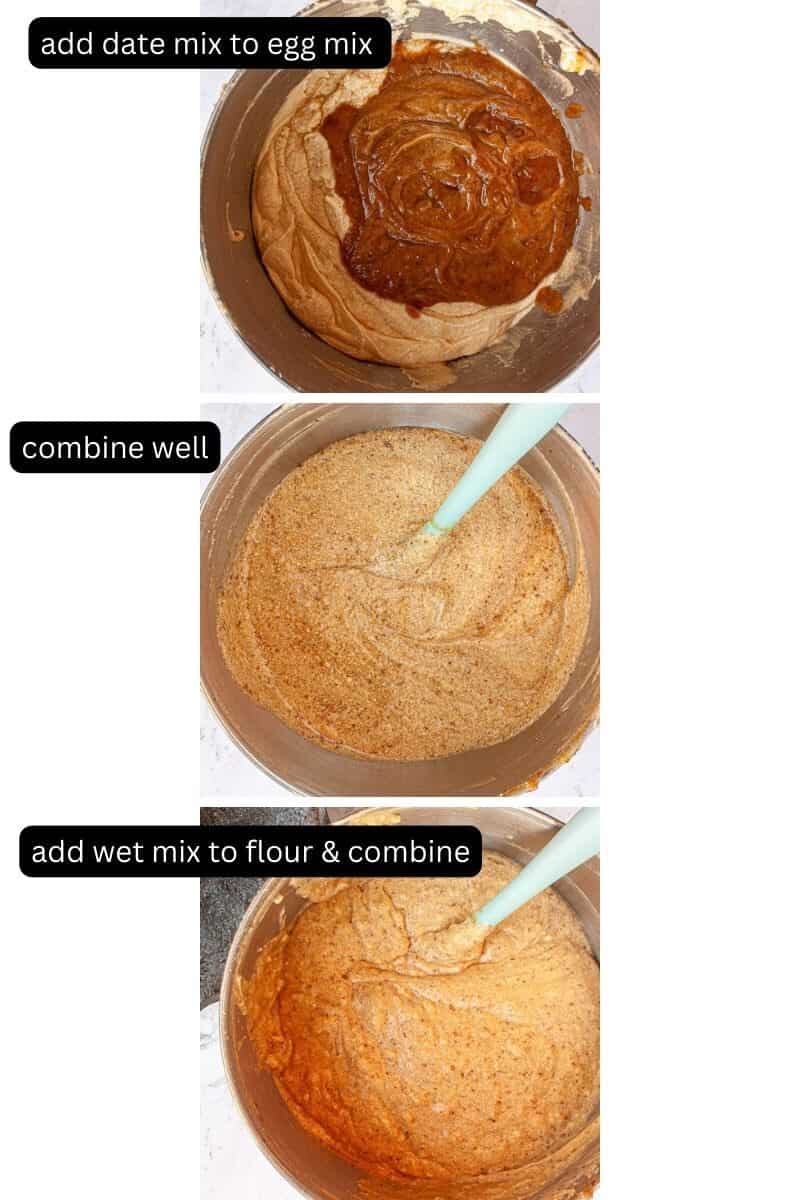
Finish the Batter
You can do the rest of the batter by hand. It's a very loose batter. It's easier to make sure there's no thicker bits stuck to the bottom using a flexible spatula. Easier than stop/starting a stand mixer. Add the pureed dates to the blended egg mix and combine well. Don't worry if the mix looks a little curdled. Sift the flour into a bowl big enough to take all the batter ingredients. Make a well in the flour and fill it with some of the wet ingredients. Gradually work the flour into the wet, working from the centre out. Add the rest of the wet ingredients in stages to avoid getting lumps. Try not to overwork the mix. As the mixture loosens, you can start adding more wet at a time.
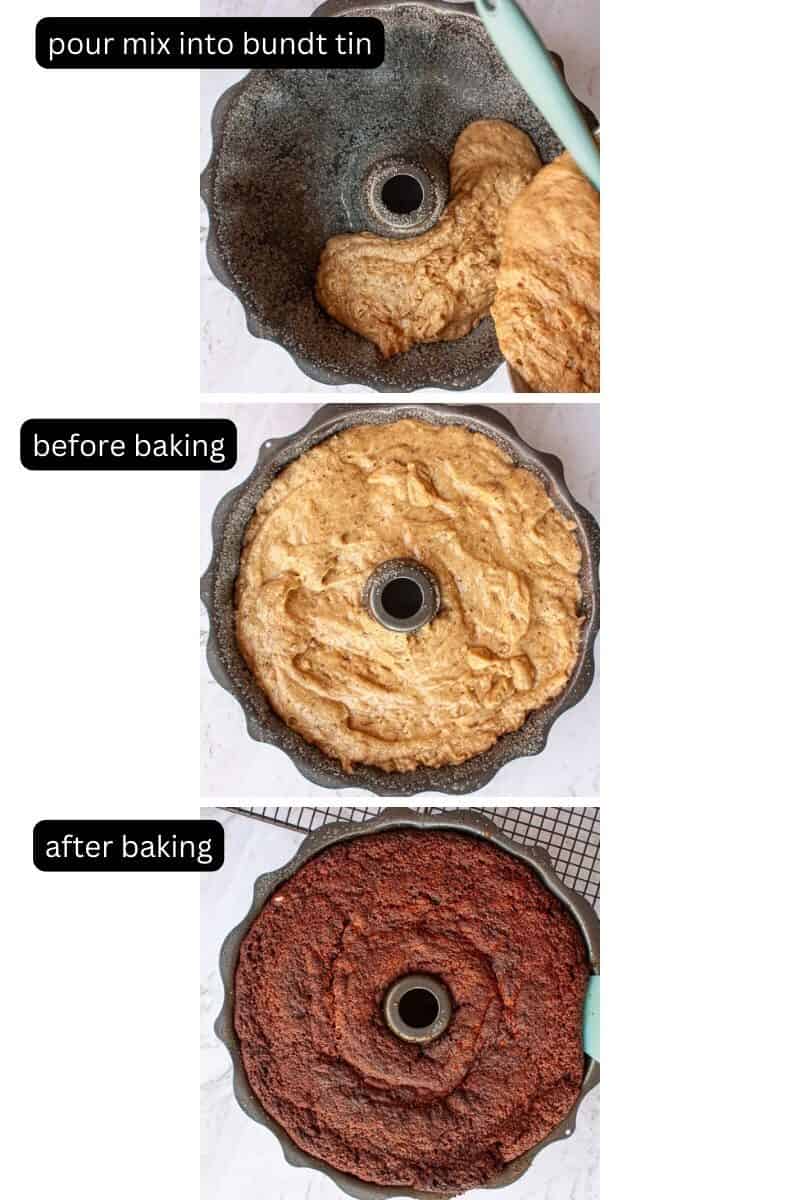
Bake
Pour the batter into the prepared Bundt tin, without getting any into centre tube. Smooth the top lightly so that it is even all the way around. Bake for around 50 minutes, or until a skewer inserted in the middle of the ring comes out sticky, but not thick with batter.
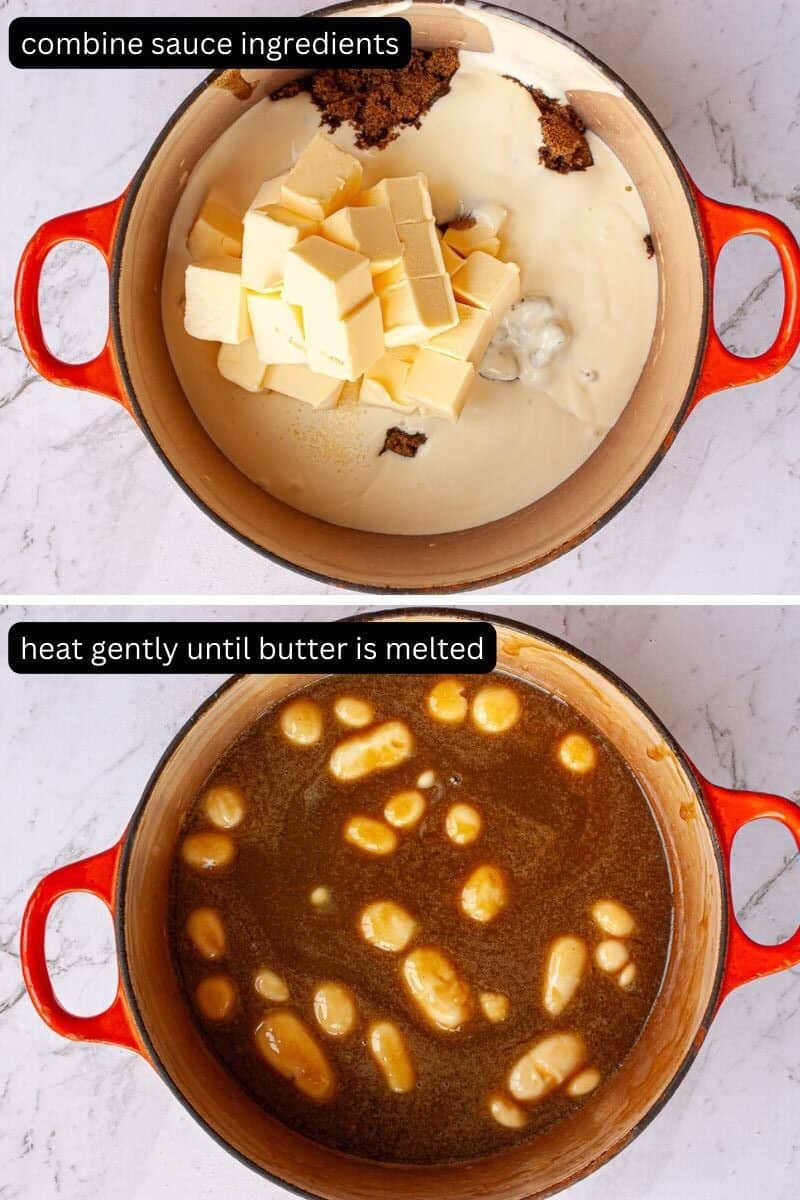
Make the Sauce
Cut the cold butter into cubes. Combine the sauce ingredients in a large saucepan set over low-medium heat. Stir often until the butter cubes melt. At this point you can increase the heat slightly. Bring to a gentle simmer for 7-10 minutes, or longer if you want a thicker consistency. Reserve about 125ml (½ cup) sauce to paint the cake. You can pour the rest into a jug for serving.
🔟Tips for Cooking Cakes in Bundt Pans
Cakes cooked in bundt tins look amazing. When it works. If a bundt cake sticks and falls apart when you're turning it out, it's heart-breaking! Follow these steps for success:
1. Use a non-stick pan (and not just one that used to be non-stick!). If it's super-scratched or worn in places, it might be time for a new one.
2. Go for simple bundt pan design. The more intricate the folds, the more 'pain-points' for releasing the cake in one piece.
3. Vegetable oil to grease - not butter. You want to work it into all the nooks and crannies. A spray makes light work of this. Otherwise, use a pastry brush or your fingers. Don't forget the centre tube!
4. Create a barrier. Use sugar (not flour). Sprinkle inside the pan to stick to the oil in an even layer. Shake out the excess.
5. Timing is everything. Don't prep your pan too far in advance. The oil (and the sugar sticking to it) will start to slide down the sides and you'll lose some of its effect.
6. Timing is everything (part two). Cool the cake in the pan for 5 minutes. Don't try to turn it out straight from the oven. This is when the cake is most fragile. On the other hand, don't allow it to cool too long in the pan either. We want the sugar coating the pan to be still slightly molten.
7. Loosen the cake before inverting. Push a flexible spatula gently down the sides of the cake all the way around the edge. Make sure the opening of the centre tube is exposed. Cut/push away any cake that has risen and baked over it.
8. Invert tin onto a cooking rack. Leave for 5 minutes. Hopefully, the cake will slip down by itself🤞
9. Not out yet? Give it a shimmy. Shake the pan gently from side to side.
10. Still not out? Return to the (turned-off) oven. The oven will be cooling, but still warm. Leave the cake in the oven for 10 minutes. Repeat steps 7 and 8. Often this mild heat is just enough to soften and release any baked-on areas clinging to the sides of the pan.
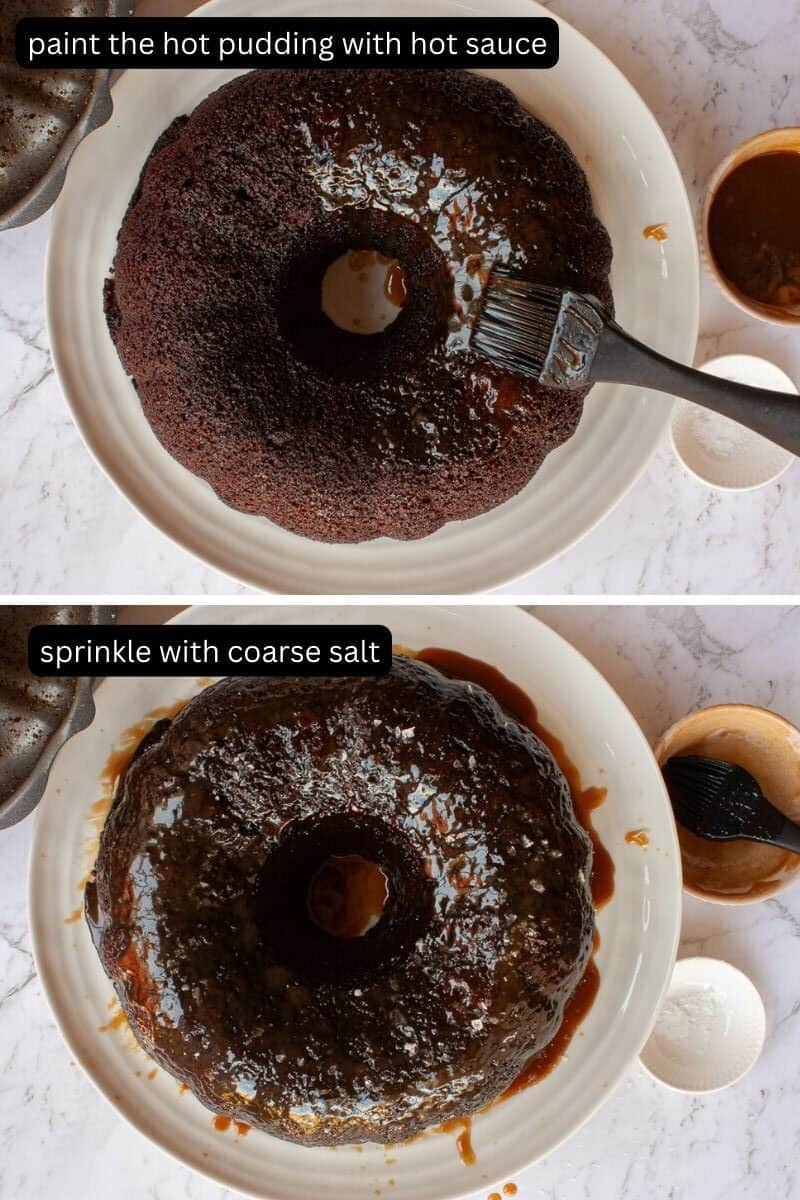
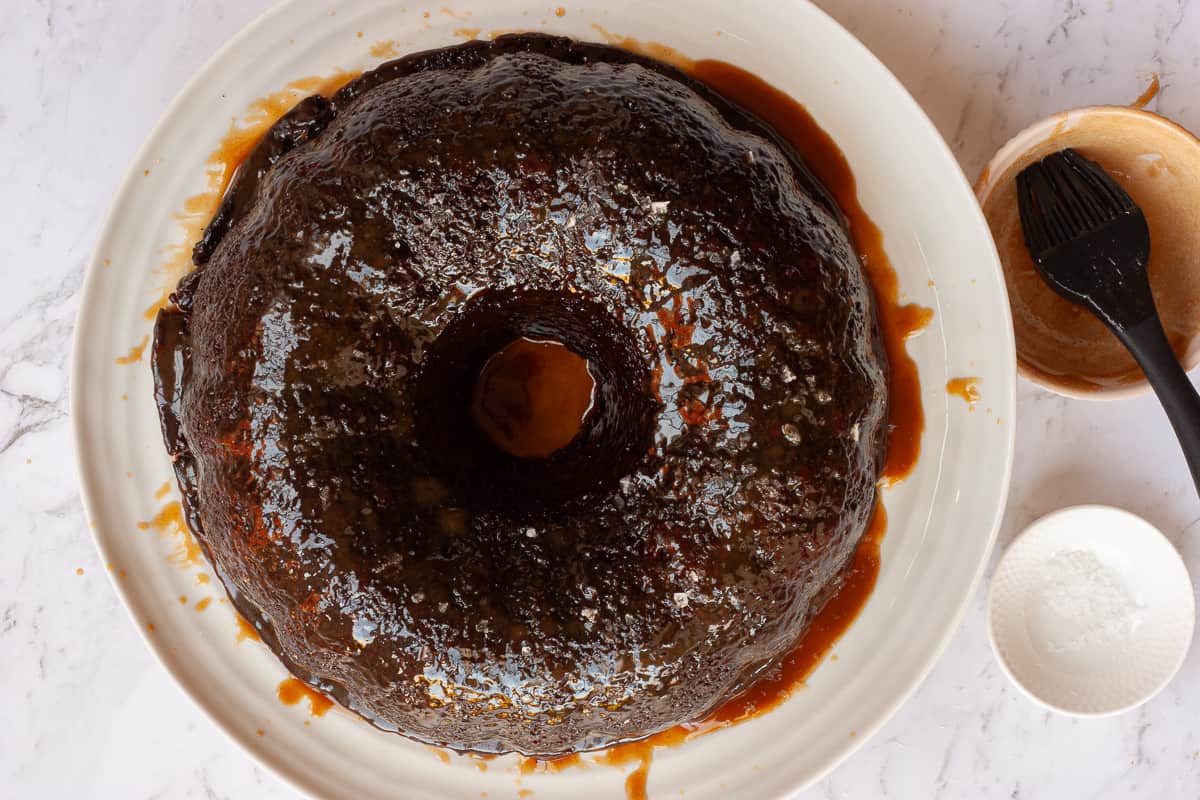
Paint the Cake
Unmould the cake. See '10 tips for cooking cakes in bundt tins' below. for advice on how to do this. Use the reserved sauce to brush the still-warm cake with the still-warm sauce all over the surface. Don't forget the inside of the hole! Pour over any remaining of the reserved amount. Sprinkle the top with some finishing salt. Allow the cake to cool, then transfer (carefully!) to a serving plate.
Paint the cake with some sauce taken from the rest. You don't want to dip your pastry brush into the whole amount to paint the cake; you'll get crumbs in it. This won't be so nice for pouring over the top of individual servings. The cake will absorb some of the sauce which helps keep it moist. When you cut the cake to serve, the outer edge will be darker brown with the sauce.
Serve
Serve hot slices with some extra sauce poured over and a scoop of vanilla ice-cream.
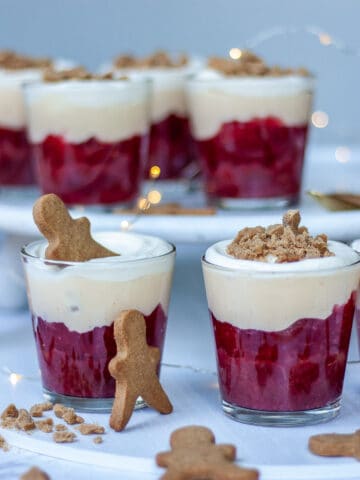
Looking for other show-stopping celebration desserts? You'll love my rhubarb, custard and gingerbread trifles. Individual serves take a little more time - is there a better way to show you love someone? Or you can make one centrepiece one to wow a crowd. You get to choose your own adventure by making all or some of the layers yourself.
📖 Recipe
Equipment
- Stick blender/food processor
- Medium Bundt tin the one used in the photos is 24cm across, and (more critically) around 3 litre capacity.
Ingredients
To Prepare the Bundt Pan
- vegetable oil spray
- 50 g (¼ cup) golden caster (superfine) sugar (note)
Cake
- 425 g whole dried unpitted Medjool dates* about 27-28 dates
- 600 ml boiling water
- 120 g unsalted butter (softened)
- 260 g golden caster (superfine) sugar
- 2 teaspoons vanilla paste/extract
- 4 eggs
- 340 g self-raising flour (note)
- 2 teaspoons bicarbonate of soda/baking soda (note)
- ⅛ teaspoon coarse sea salt/finishing salt for sprinkling over finished cake
Butterscotch Sauce (makes about 1 litre)
- 260 g unsalted butter (cold)
- 500 ml double/heavy/thickened cream (460g)
- 400 g soft dark brown sugar
- 2 teaspoons vanilla paste/extract
- ⅛ teaspoon salt
Instructions
- Boil Water - put the kettle on. We need hot water for soaking the dates.
- Preheat Oven - to 160°C.
- Pit Dates - one at a time, remove any stalks (which look like little caps). Squeeze the date between your thumb and first finger at one end to push the pointy pit/stone out. The date will naturally split. Discard the stone and finish tearing the date in half. Place the date pieces in:in a large heat-resistant and deep container if you'll be using a stick-blender to blend them later. A straight-sided saucepan works well, ORstraight into the food processor bowl if using that.425 g whole dried unpitted Medjool dates*
- Soak- cover the dates with 600ml boiling water. Make sure all the dates are under the surface of the water. Leave to soak while you continue with the recipe.600 ml boiling water
- Cream Butter & Sugar - using a stand-mixer (blade attachment) or electric hand whisk at medium speed until well combined. It will get a little lighter and fluffy, around 5 minutes. Don't worry if the sugar hasn't fully dissolved. It's OK if the mix still feels a bit grainy when you rub some between your fingers.120 g unsalted butter260 g golden caster (superfine) sugar
- Eggs & Vanilla - by hand, whisk the vanilla and eggs together in a bowl. Add this in three stages to the creamed butter and sugar. Stop the mixer before adding each addition. Use a silicone spatula to loosen any congealed mix from the bottom of the bowl. Once you have added all the egg, continue whisking at medium speed for another 5 minutes. The mix will be smooth and not grainy now. You can do the rest of the mixing by hand.4 eggs2 teaspoons vanilla paste/extract
- Prepare Bundt Tin - generously spray the inside of your tin with vegetable oil, including the inner tube. Sprinkle in some sugar and shake to distribute evenly. Shake out and discard any excess.vegetable oil spray50 g (¼ cup) golden caster (superfine) sugar
- Bicarbonate Soda - sprinkle the bicarbonate of soda over the dates in water and blend. The mix will lighten in colour and texture and foam up slightly.2 teaspoons bicarbonate of soda/baking soda
- Combine Wet Ingredients - add the pureed dates to the blended egg mix from before. Combine well. A flexible spatula is handy for making sure there is no unmixed batter at the bottom of the bowl. Don't worry if the mix looks a little curdled.
- Batter - sift the flour into a bowl big enough to take all the batter ingredients. Make a well in the flour and fill it with some of the wet ingredients. Gradually work the flour into the wet, working from the centre out. Add the rest of the wet ingredients in stages to avoid getting lumps. Try not to overwork the mix. As the mixture loosens, you can start adding more wet at a time.340 g self-raising flour
- Pour - into the prepared bundt tin, trying not to get any into the centre tube. Smooth the top lightly so that it is even all the way around.
- Bake - for 50 minutes, or until a skewer inserted somewhere in the middle of the ring comes out sticky, but not thick with raw batter. Retest the batter after 5-minute intervals if the batter is still raw.
- Make the Sauce - cut the butter into cubes. Combine the sauce ingredients in a large saucepan set over low-medium heat. Stir often until the butter cubes melt. Now you can increase the heat and bring to a gentle simmer for 7-10 minutes, or longer if you want a thicker consistency. Keep a close eye on it, it will easily boil over if it gets too hot. Take off the heat if it's starting to rise until it settles again. If it splits, don't fret. Whisk energetically or use a stick immersion blender and it will come good. Reserve about 125ml (½ cup) sauce to paint the cake. You can pour the rest into a jug for serving.500 ml double/heavy/thickened cream400 g soft dark brown sugar260 g unsalted butter2 teaspoons vanilla paste/extract⅛ teaspoon salt
- Unmould Cake - let the cake sit in the pan for 5 minutes out of the oven. Then use a thin silicone spatula to work a little way down the sides all the way around to loosen the cake. If there is any cake over the opening of the centre tube, cut or push this away gently. Wearing oven gloves, hold a cooling rack over the top of the cake and invert both the tin and the rack together. Leave for another 5 minutes without removing the pan. Hopefully, the cake will slide down over this time and you can gently lift the pan away. If not, give the pan a gentle shimmy. Still not coming out? Return the cake to the cooling (but still warm) oven for about 10 minutes. Then repeat the loosening, inverting and shimmying technique.
- Paint Cake - using the reserved sauce, brush the still-warm cake with the still-warm sauce all over. Don't forget the inside of the hole. Pour over any remaining sauce. Sprinkle the top with some finishing salt. You might want to put a tray under the cooking rack to collect drips. Allow the cake to cool, then transfer (carefully!) to a serving plate.⅛ teaspoon coarse sea salt/finishing salt
- Serve - Serve slices with some extra sauce poured over and a scoop of vanilla ice-cream.
Notes
Microwave individual portions of the cake with a few tablespoons’ worth of sauce dolloped on. This will only take about 45 seconds until the cake is heated through and the sauce in molten and bubbling hot. How to reheat the whole pudding I have made this in advance to reheat for big gatherings. Turn the pudding out of the bundt and paint with sauce as normal. Place on an ovenproof platter. Cover with baking paper and foil. You can freeze it at this point if you’re making more than a few days in advance. Defrost in the fridge overnight if frozen. Keeping it covered, warm though in a preheated oven set to 160°C for 40 minutes. Bring the sauce to room temperature. Reheat in the microwave or in the oven alongside the cake. Stir occasionally. If it splits, whisk like crazy or use a stick blender. Don't have a bundt tin? These pan sizes will work too.
Round pan 24cm across (9 ½ inch)
Square pan 25cm sides (10 inch)
Rectangular pan 30 x20cm (12 x 8 inch), or equivalent dimensions. Note that bundt cakes generally take a bit longer because the cake is quite deep. If you cook in a non-bundt cake tin, start checking for doneness after 35 minutes, in 2-5 minute intervals. Want to do a half-batch? Use these pan sizes for half the batter. You can halve the sauce too.
Round pan 19cm (7 ½ inch)
Square pan 19cm sides (7 ½ inch)
Rectangular 23 x15cm (9 x6 inch), or equivalent dimensions. Start checking the cake for doneness after 25 minutes, in 2-3 minute intervals. Want to make gluten-free? Easy. Just replace the flour with self-raising gluten-free flour. I've tried this and it tastes and 'behaves' exactly the same.
Comments