Think you can't make traditional Italian-style pizzas at home without a pizza oven? Think again.
You CAN make delicious hand-stretched pizzas with a thin and crisp crust and perfectly minimal toppings. They will look like they came from a boutique pizzeria, without the price tag. All you need to achieve simple Italian perfection are basic good-quality ingredients, a bit of patience and a very hot oven.
We let the dough ferment for a minimum of one day (and up to 3 days) in the fridge for the ultimate in texture and flavour. These pizzas are hand-stretched for a thin, crisp base with a chewy bubbly crust. We crank up our domestic ovens to the max. to achieve a blistered crisp crust that looks like it came out of a wood-fired oven.

I've given three topping options - Margherita, Hawaiian and Pepperoni. I do realise that Hawaiian is not 'traditional', but it's my kids' favourite!
If American deep-pan pizza is more your thing, check out my Chicago Pizza recipe. I honestly can't decide which style I like the most. We alternate them in our house because we don't pick favourites when it comes to dough and cheese 🤤
This is a long recipe, but only because there's a lot of notes to help you. I (pinky) promise it's not that tricky.
👪 Serving size
This recipe makes three traditional pizzas, enough for 3-4 people.
🥘 Ingredients
There's no sugar in this dough. The long ferment time gives the yeast plenty of time to make wonderful bubbles without the help of sugar. The high temperature for baking creates the browning of the crust without the need for sugar.
'OO' flour - also known as doppio zero flour, is a finely milled Italian flour that is exceptionally soft and finely ground, making it ideal for pizza dough. It has a lower gluten content compared to other flours, which results in a more elastic and airy crust when used in pizza dough recipes. This characteristic helps achieve a crisp yet tender texture that is prized in traditional Italian-style pizzas.
Strong or bread flour - is characterized by its high gluten content, typically around 12-14% protein. This makes it ideal for pizza dough as it promotes gluten development, resulting in a stretchy and chewy crust that can support toppings and bake to a crispy texture on the outside while remaining tender inside.
Toppings - less is more
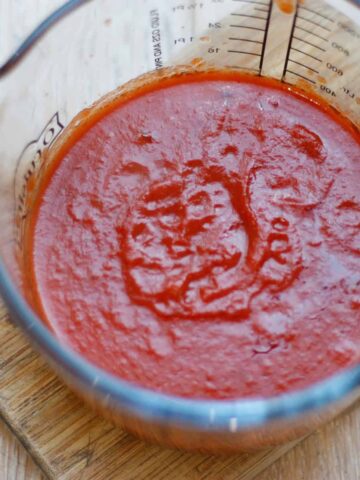
You've gone to the effort of making your own pizza bases. And the base is the star of the show here. We use minimal (but best quality) toppings to let the base do the talking. Of course, my pizza sauce comes highly recommended. This is used in several of my other recipes, such as Vegetable Lasagna and Eggplant (Aubergine) Parmigiana.
Get good (not pre-shredded!) mozzarella, fresh basil leaves (the smaller the better), best quality extra virgin olive oil. If you're making the Hawaiian, fresh pineapple makes a massive difference. Canned pineapple will look and taste canned, that is to say it will be wetter and more mushy.
Working out the optimal amount of topping took a bit of trial and error (you're welcome). I'm sure I've found the Goldilocks-and-the-three-bears kind of 'just right'. Too little topping and the pizzas feel too austere. Too much and the base (the undoubted hero here) is overpowered.
The crust is so good you'll want some 'naked'. You also want to avoid getting toppings around the outside of the pizza. This will make the base soggy and stain your pizza stone 😊
⏲️ Timings
When do you need to start making these?
Decide what night you want to eat them. Start at least 1 night (or up to 3 nights) before. For instance, if you want them Saturday night, make the dough Friday night. Or as far back as Wednesday night.
The dough needs to spend a couple of hours sitting at room temperature before and after the long fridge rest. It's important to look for certain signs that the dough is ready before proceeding to put the dough in the fridge or to press it out into rounds. Don't worry; all will be explained!
Here is the overview of timings. Step 3 is where the time 'flex' can happen to fit in with your schedule:
- Make Dough (25 minutes)
- Bulk Fermentation (First Rise) - 1 to 3 hours
- Long, Cold Fermentation - 1 to 3 days. Make pizza sauce in this time (if making your own)
- Divide/Reshape/Final Proof/Preheat Oven - 2-4 hours
- Cook & Serve - pizzas takes 8-10 minutes to cook. You can start to prep each base while the previous pizza is cooking.
🔪 Instructions
The dough is simple. We combine two types of flour with water and yeast in a stand mixer and leave to rest for 15 minutes.
The recipe states 'luke-warm' water. Think baby bath water temperature - slightly warm, definitely not hot. This is the optimum temperature to get the yeast awake and doing it's thing. Don't be overly concerned with the actual temperature. As long as the water isn't hot (which will kill your yeast, full-stop), the yeast has plenty of time to work its magic.
Haven't used your yeast for a while and worried it's dead?
Add luke-warm water to the yeast and leave to sit for 5-10 minutes before adding the flour. It should form a bubbly raft on the surface of the water which demonstrates it's alive and kicking and you can proceed with confidence! If it doesn't, it might be worth a trip to the supermarket to buy some more. This is unlikely to happen; instant dried yeast is a very stable long-lasting product.
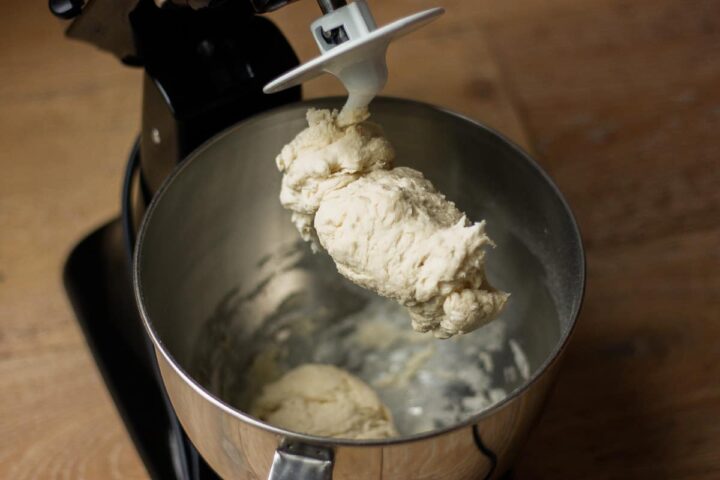
We add salt and knead a bit more. Wondering why we don't add the salt with the other dough ingredients at the start? It's because salt and yeast are not friends. We add salt a bit later to allow the yeast to be worked through the dough. The wait gives the yeast a bit of a head-start.
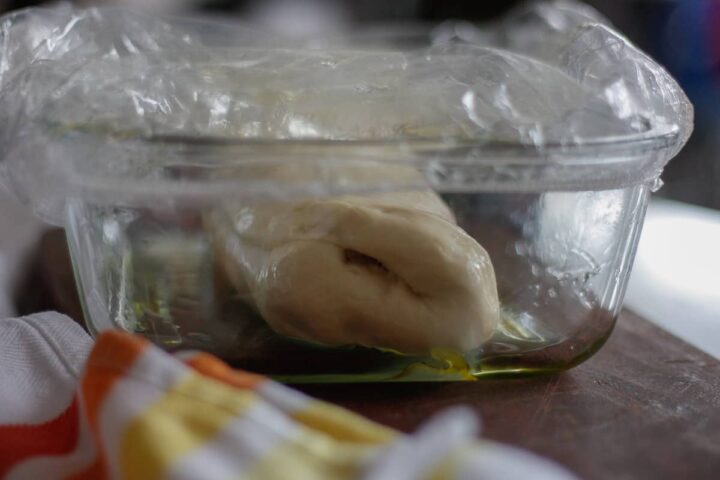
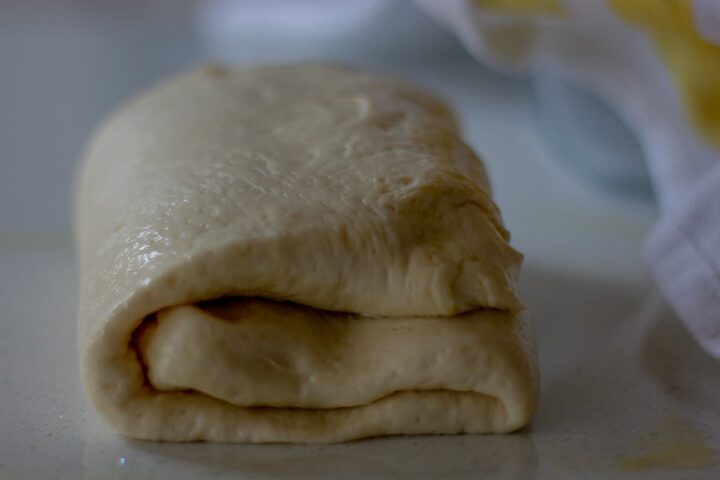
We press the dough out and fold in thirds (like a letter). We place in an oiled container and leave to prove (roughly double in size) which will take 1 to 3 hours, depending on the temperature of the environment.
Freshly made dough ready for bulk fermentation (first rise).
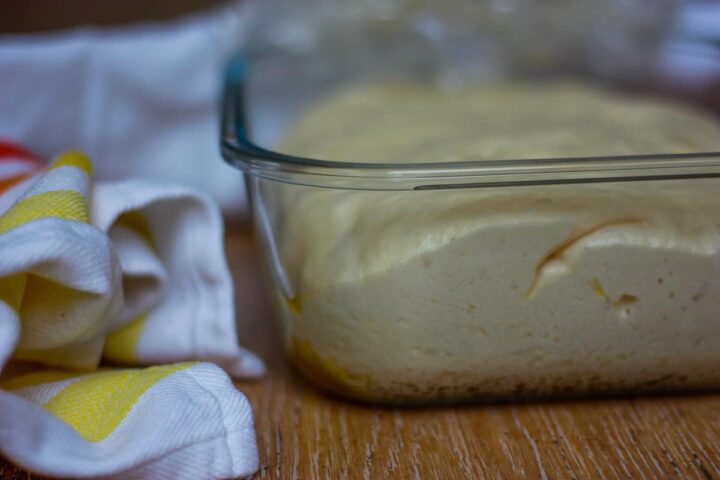
Dough after bulk fermentation (first rise):
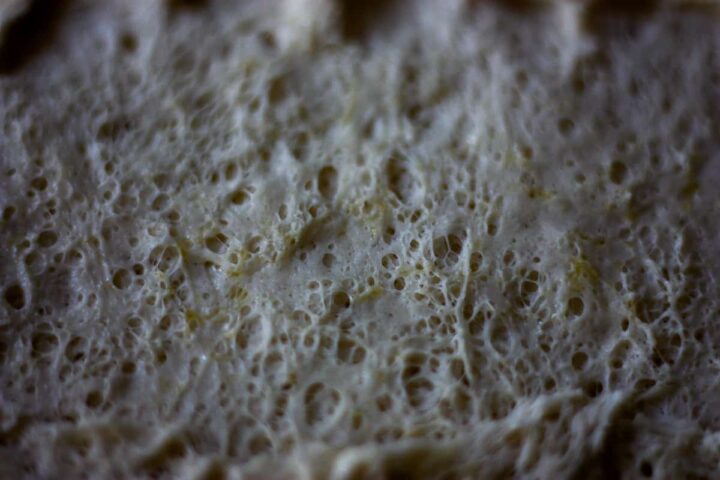
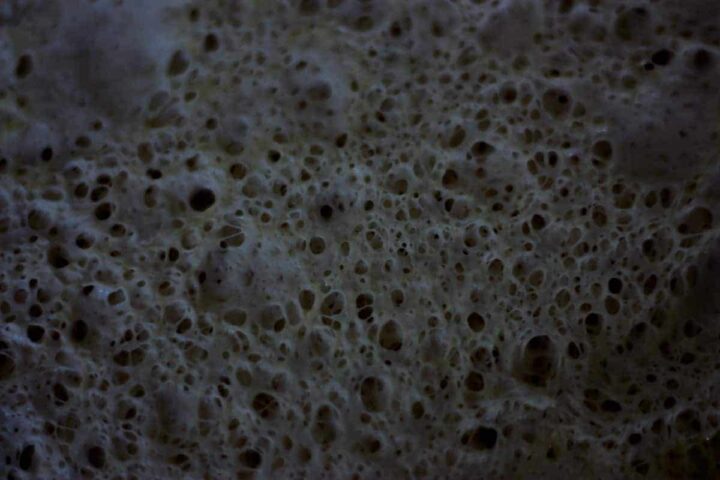
Close-up of air bubbles in the dough after bulk fermentation (first rise):
We repeat the process of pressing out the dough and folding in thirds before a long fridge ferment.
We transfer to the fridge for 1 to 3 days (the longer the better!). Check out the more plentiful and better-formed yeast holes after this time:
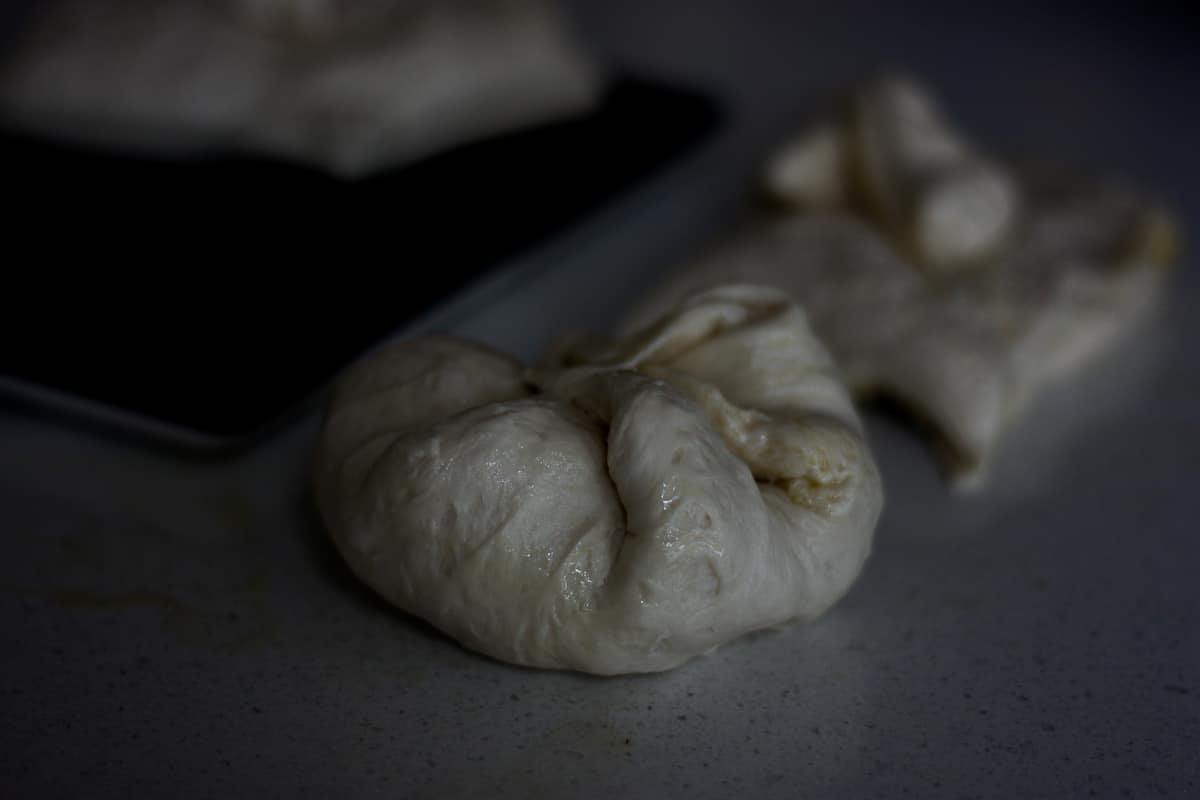
Take the dough out of the fridge. Divide into three portions and form balls.
Form balls by making a 'C'-shape with your thumb and index finger, applying pressure in a circular motion.
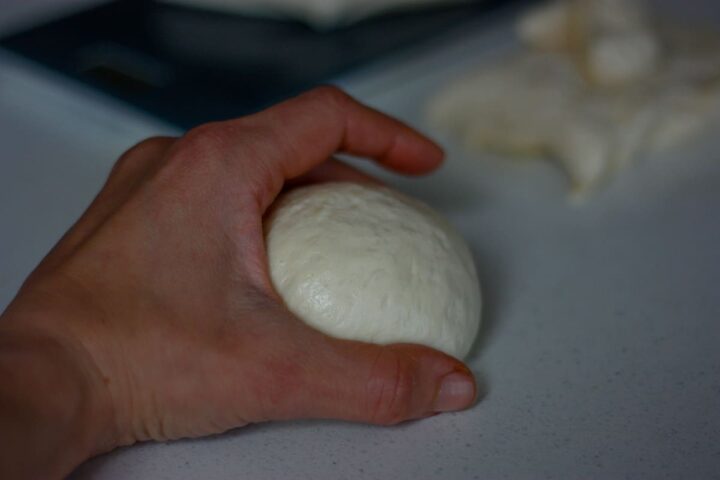
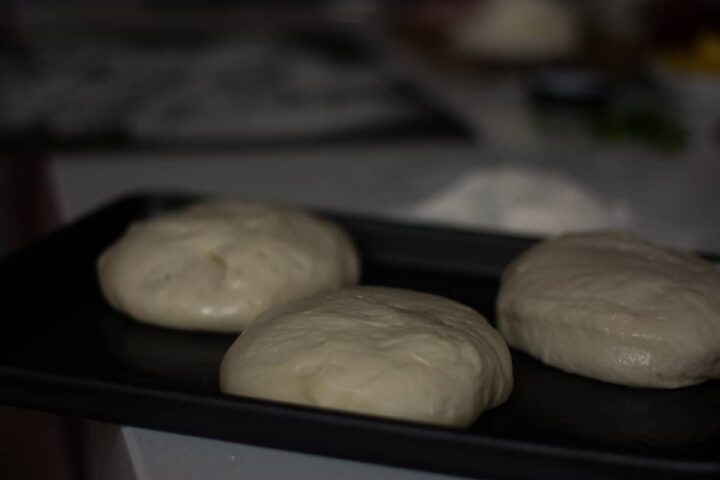
Transfer the balls (leaving some space between them) to an oiled baking sheet. Let them rise at room temperature until puffy and very soft. This will take about 2-4 hours.
Freshly formed dough balls before final rest.
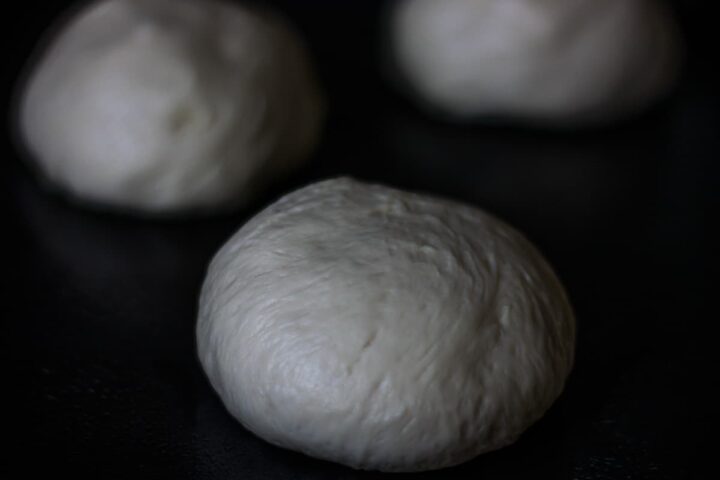
The dough balls just before hand-stretching. They've collapsed and relaxed a bit.
There's no such thing as too hot for these pizzas. Your oven needs to be set as hot as it will go. Let it preheat while the dough balls are relaxing (with a pizza stone in position if you have one) for at least an hour.
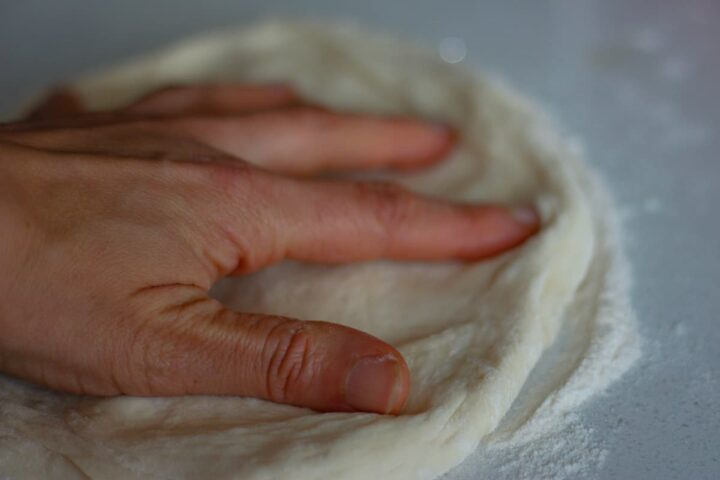
When the oven's screaming hot and we have our toppings ready to go, we can hand-stretch the first base. We generously coat the dough ball in flour and press out the round on a heavily floured work surface. We really want to avoid tearing the dough. Any tears prevent the base getting fully crisp because the topping leaks through.
Stretching the dough balls out using an out-stretched palm and spinning on a floured surface.
We gently transfer our beautifully thin round onto a semolina-ed pizza peel. We mindfully top with our minimalistic ingredients and shimmy it into the very hot oven for 8-10 minutes.
Spreading the tomato sauce with the back of a spoon, keeping the edges clear.

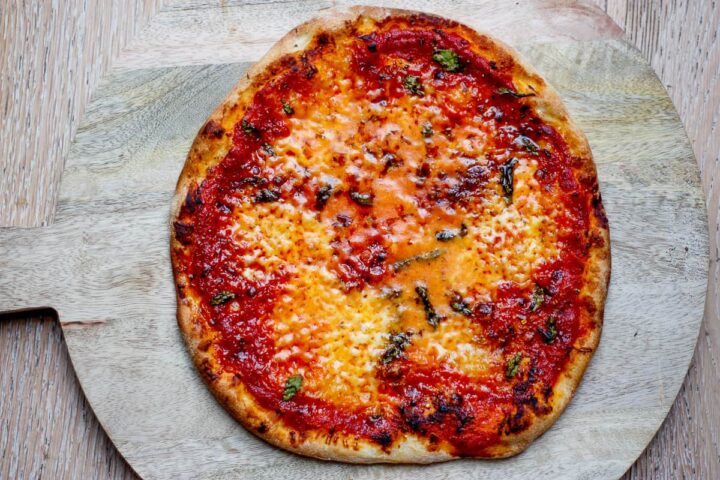
Margherita pizza ready for the oven atop a semolina-dusted baking sheet for easy transfer.
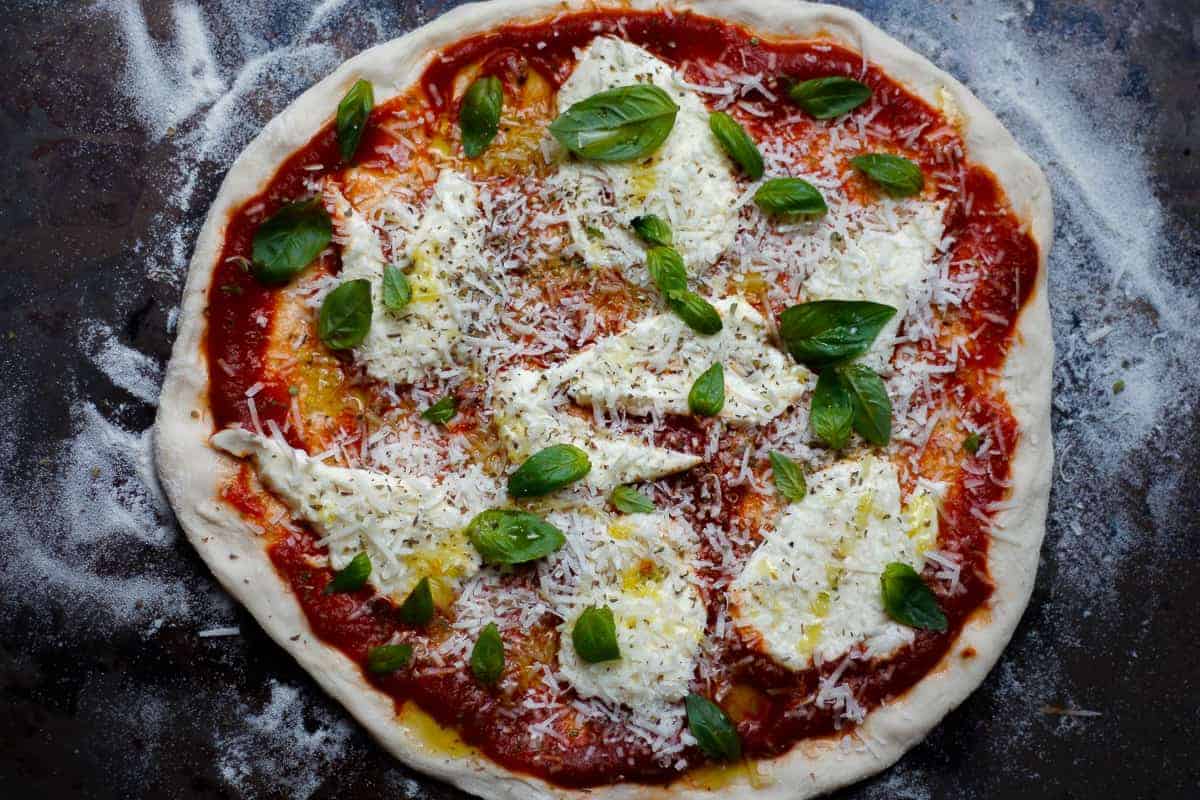
Margherita pizza.
❓FAQs
Traditional pizzas cook in direct contact with a flat blazing hot surface. A pizza stone is an unglazed ceramic round that preheats in the oven and is superb at retaining heat. You cook pizzas directly on it. You need to allow a pizza stone to both heat up and cool down slowly with the oven. The stone could crack if exposed to abrupt changes in temperature. It gets stained with leaking sauce and oil, but we can deal with that. You can't really clean these, just scrape off any debris once cool. Pizza stones are readily available and well-priced.
If you don't have a pizza stone, you can improvise. A flat metal surface such as a baking sheet (turned upside down if it has a lip) is a good substitute. The surface needs to be flat for a couple of reasons. Firstly; you want to be able to shimmy the pizza into the oven without delay, limiting heat loss out of the oven door. Secondly; you can also drag the pizza out quick-smart so it doesn't burn.
The aim is to push air bubbles to the edges of the pizza, not squash them flat. This creates an airy crisp crust and a recess to contain your toppings. You can't do this with a rolling pin. It's easier to get an even round shape using your hand too
The base will naturally get to a point where it doesn't seem to want to get any bigger. For this amount of dough, it is usually around 25-30cm. It should get so thin in the middle that you 'can read a newspaper through it'. I haven't actually tried this, but I can believe it's true. We need to pick up the dough very gently with the back of our hands to transfer it to a flat baking sheet or pizza peel. Make sure you do this before topping!
It's a nifty tool for maneuvering pizzas into and out of your oven quickly and smoothly. This avoids spills and burns. It enables us to keep the oven door open for as little time as possible, keeping the high heat inside. If you don't have a pizza peel (I don't either), you can improvise with a flat baking sheet. Either way, we dust with a sprinkle of semolina to assist with sliding the pizza.
📖 Recipe

Equipment
- (optional) Pizza Stone
- Flat baking sheet/pizza peel
Ingredients
DOUGH (3 Pizzas)
- 220 ml lukewarm water
- 2 ¼ teaspoons instant dried yeast 7g
- 170 g 'OO' flour (note)
- 180 g strong/bread flour (note)
- 12 g salt
- olive oil
FOR STRETCHING OUT THE DOUGH
- a little plain flour
- a little semolina
TOPPINGS (ALL THREE PIZZAS, PER PIZZA)
- 80/ml pizza sauce
- 70g mozzarella sliced and dried between layers of paper towel
ADDITIONAL TOPPINGS (PER PIZZA)
Hawaiian
- 30 g ham thinly sliced/torn
- 60 g pineapple fresh, cut into small chunks
- dried oregano
- salt
- drizzle of olive oil
Margherita
- 5 g parmesan cheese finely grated (about a Tablespoon's worth)
- sprinkle of dried oregano
- basil leaves
- sprinkle of salt
- drizzle of olive oil
Pepperoni
- 40 g pepperoni thinly sliced
Instructions
Prepare the Dough
- Water, Yeast, Flours - in a stand-mixer bowl, add water and yeast. Combine briefly with a hand whisk, then top with both types of flour.220 ml lukewarm water2 ¼ teaspoons instant dried yeast170 g 'OO' flour180 g strong/bread flour
- First Knead - using the dough hook attachment, mix at medium speed until the dough comes together. This will take about 2 minutes. It will look craggy.
- Rest Dough - drape tea towel over bowl and let the dough rest for 15 minutes.
- Add Salt, Second Knead - add salt and mix again at medium-high speed, until the dough is smooth and elastic, about 5 minutes.12 g salt
- Laminate Dough - turn the dough out onto a slightly oiled surface. Press out into rectangle with your fingers (it will be quite stiff), then fold into thirds like a letter. Rub some oil around a plastic/glass container and lay in the dough, turning it over several times to coat with oil.olive oil
- Bulk Fermentation/First Rise - cover the container loosely with a shower cap or plastic wrap. Allow to rise at warm room temperature until its volume has roughly doubled. This will take 1-3 hours. When you prod the dough gently with a finger, it should rebound slightly.
- Laminate Dough (again) - gently tip the dough out. Press into a rectangle with your fingers, then fold in thirds like a letter again.
- Long Cold Fermentation - place the folded dough back into the oiled container. There needs to be some extra space to allow for a little growth. Refrigerate at least one day, up to three days.
Making the Pizzas
- Portion Dough - remove the dough from the fridge. Gently tip out onto and un-floured work surface. Press out any big bubbles and divide into three even portions.
- Shape Balls - form each portion into a rough ball shape. The dough will be quite stiff. Gather the edges under and pinch together to form a domed, taut top surface. Place seam-side down onto an un-floured work surface. Under a cupped palm, roll in small circles to form a tight, even ball. You'll want to keep your hand quite open but press down on dough firmly. The goal is to end up with a tight ball with no large cracks or crevices. Make sure to check the underneath of the ball too. Continue to roll the dough under your palm until it is relatively smooth. Any large seams will make the pizzas tear easily once stretched
- Final Proof - transfer the dough balls to a baking sheet sprayed with a little olive oil. Leave some space between them. We want them to stay separate even after relaxing and flattening. Spray the tops with some oil before covering loosely with plastic wrap. Let them rise at room temperature until they get puffy and soft. Depending on room temperature, this will take around 1 to 3 hours. When gently prodded, the fully proved dough springs back a little, but leaves a slight indent. If it's too springy, it's not ready yet; the pizza bases will shrink back in when you try to stretch them out.
- Preheat Oven - at least an hour before baking the pizzas, preheat to max. heat. Put a pizza stone in place on a centre rack.
- Prepare Toppings - get all the toppings organised. You want to be ready to top and bake the first pizza as soon as you have stretched the first base. This list of ingredients below assumes you are making one of each. You'll need 80ml (⅓ cup) of pizza sauce and 70g mozzarella PER pizza. The rest of the toppings depend which one you're going to make.
- Flour Work Surface - on the work surface (not right next to the edge!), combine 2 Tablespoons semolina flour and 2 Tablespoons plain flour. Bring together into a flattened mound.a little semolinaa little plain flour
- Pizza Peel - sprinkle some extra semolina to aid with sliding the prepared pizza into the oven.
- Initial Stretch - once your dough balls have had their final proof and feel soft and puffy, it's time to stretch. Put two tablespoons plain flour in a medium-sized bowl. Handling the dough gently, put one of the dough balls in and turn to coat on all sides, including the edges. Put a portion of dough on top of the mound of flour. Start by gently pressing a ball into a smaller circle, around 20 cm. Don't worry if it's a bit thick at this stage - this first press is just to get the dough relaxed. Set it aside and repeat with the other two dough balls. Let them rest 5-10 minutes, loosely covered, so the gluten can ease off a little and stop springing back.a little plain flour
- Final Stretch - Once ready to bake a pizza, it's time to get it to full size. Work gradually: start by gently pressing from the centre out with your fingertips, keeping the edges slightly thicker to form an airy rim. Rotate the dough as you stretch, and don't be afraid to drape it over your knuckles or cupped fists - let gravity do some of the work. If the dough resists or springs back, pause a few minutes and let it relax; a few small rests make a huge difference. Avoid rolling pins or pressing too hard - the goal is gentle stretching so the crust stays soft, airy, and puffy at the edges while the base becomes thin enough to cook perfectly.
- Transfer Base to Pizza Peel - lightly pick up the dough by draping it over the backs of your hands. Gently transfer to the semolina-lined pizza peel.
Apply Toppings - pick a pizza!
- Hawaiian PizzaEvenly spread the pizza sauce, leaving a 1cm border sauce-free. Evenly distribute the mozzarella and then the other toppings.80/ml pizza sauce70g mozzarella30 g ham60 g pineapplesprinkle of dried oreganosprinkle of saltdrizzle of olive oil
- MargheritaEvenly spread the pizza sauce, leaving a 1cm border sauce-free. Evenly distribute the mozzarella. Save some basil leaves to sprinkle over the cooked pizza. Evenly distribute the other toppings.80/ml pizza sauce70g mozzarelladried oregano5 g parmesan cheesebasil leavessprinkle of saltdrizzle of olive oil
- Pepperoni Evenly spread the pizza sauce, leaving a 1cm border sauce-free. Evenly distribute the mozzarella. Evenly distribute the other toppings.80/ml pizza sauce70g mozzarella40 g pepperoni
- Slide Pizza - with confidence, slide or shimmy the pizza quickly and smoothly onto the pizza stone. Shut the oven door quick-smart.
- Bake Pizza - bake for around 8-10 minutes. The pizza is ready when the crust is deep golden brown and beginning to char and bottom of pizza is crisp. Try not to open the oven door to check during bake.
- Get Next Pizza Ready- gathering up the flour into a mound again, repeat steps from 'Final Stretch' onwards with the next dough ball. Top just before the pizza goes in the oven. The pizzas are best served a few minutes after pulling out of the oven. Top the next pizza and get it in the oven while it's resting.
- Remove from Oven - when cooked, use tongs to pinch the nearest bit of crust and pull out directly onto a wooden serving board. Close oven again quickly. Bring the pizza to the table to serve and throw the next prepared pizza in the oven. Let pizzas rest for about 5 minutes before serving.
Comments